Have you been wondering how businesses connect QuickBooks Online to Power BI to get the best of their financial data? Understanding financial data is important for making smart decisions and growing a business in today’s data-focused world. For many businesses, QuickBooks Online serves as the go-to platform for managing finances and generating reports.
Whether you’re a small business owner, finance professional, or data analyst, mastering this connection can revolutionise the way you analyse and visualize your financial data.
This guide will demonstrate two ways to connect Power BI to QuickBooks Online reports. We will also explore the advantages and disadvantages of each method. By following these steps, you can seamlessly integrate your financial data and obtain valuable insights.

Instead of spending dozens of hours on data blending and limiting yourself to connecting to only one QuickBooks Online account at a time, you can use the Power BI connector to QuickBooks Online by Vidi.
Advantages:
The connector will extract the data from QuickBooks Online API to an Azure SQL Server database. Once the data is fully extracted, you will be able to connect your Azure SQL Server database to Power BI. The integration between Azure and Power BI is very stable allowing you to work with large volumes of data if necessary.
This connector offers a free trial so that you can verify all the benefits. Here is how to try the connector and see the benefits for yourself
Go to https://vidi-connectors.azurewebsites.net/ and create your free account

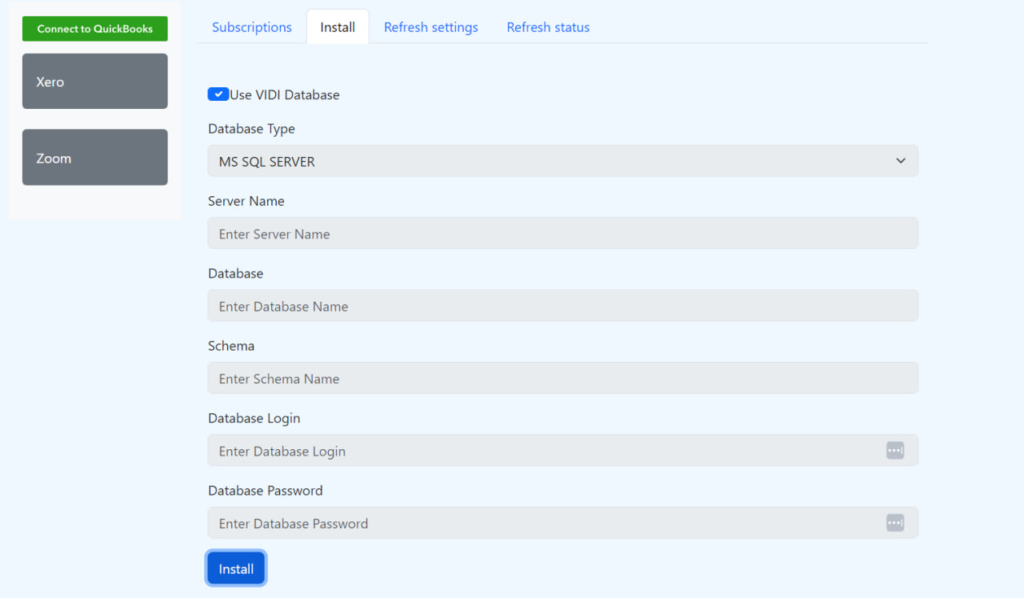
Once you register, you will be able to select your database usage preferences on this window. If you tick the box “Use Vidi Database”, your data will be loaded to a database hosted by Vidi Corp. Alternatively, if you have your own Azure account, you can create your database and input the necessary details in the windows below.
Once you click the “install” button, the system will create the necessary tables inside of the database. Once you authenticate to your QuickBooks Online account through the portal, the data will flow to those tables.
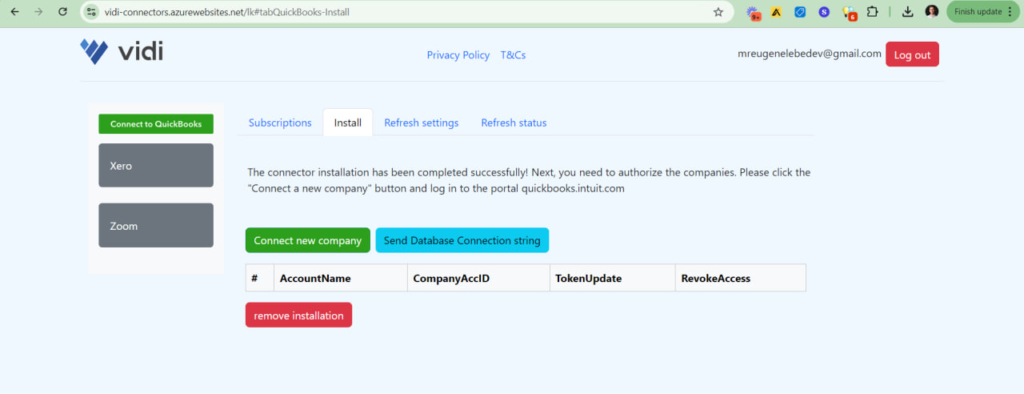
Once your tables are created, you will be able to reopen the install tab and see the next step of the installation process. Simply click on the “connect new company” button to extract the data from the company that you want to connect. You can use the same button for multiple companies.
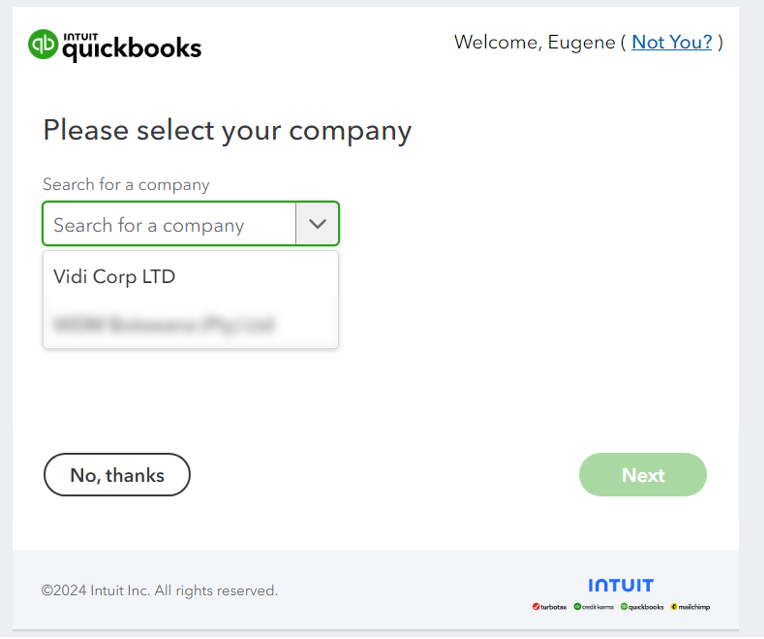
Upon clicking “connect new company”, a new window will appear where you can select the company and extract its data to the database.
Once you click next and authorise access to your company, you will be able to see it in the table below.
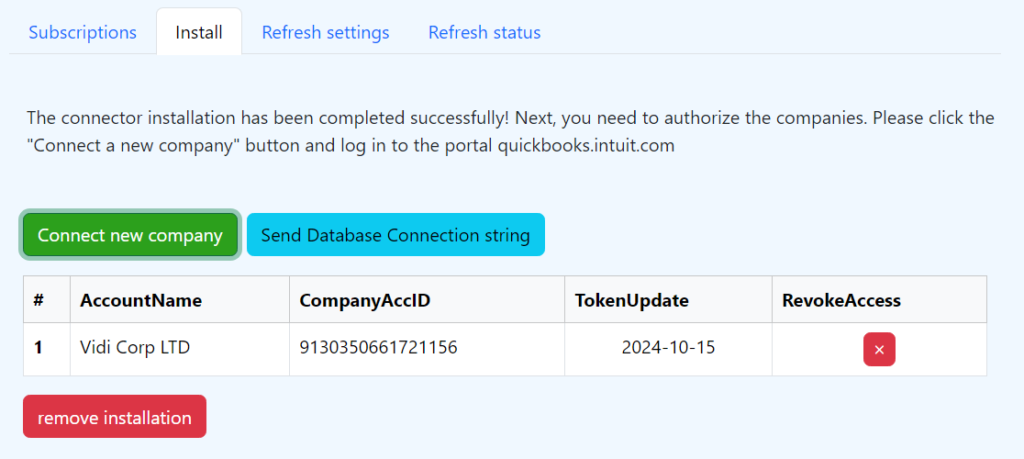
Please note that the “RevokeAccess” button allows you to revoke the access to your QuickBooks Online account from the Vidi Corp connector. If you press it, the data of the cohen company will no longer be extracted. However all the data that has been extracted to date will still be stored in the database.
If you want to delete the data that has been extracted into the database to date, you can click the “remove installation” button. This button will delete all the tables and the data inside.
Once your data starts extracting, you will be able to monitor the loading of data in the “Refresh Status” window. Your data will be fully ready to use once all the tables show that they are 100% loaded.
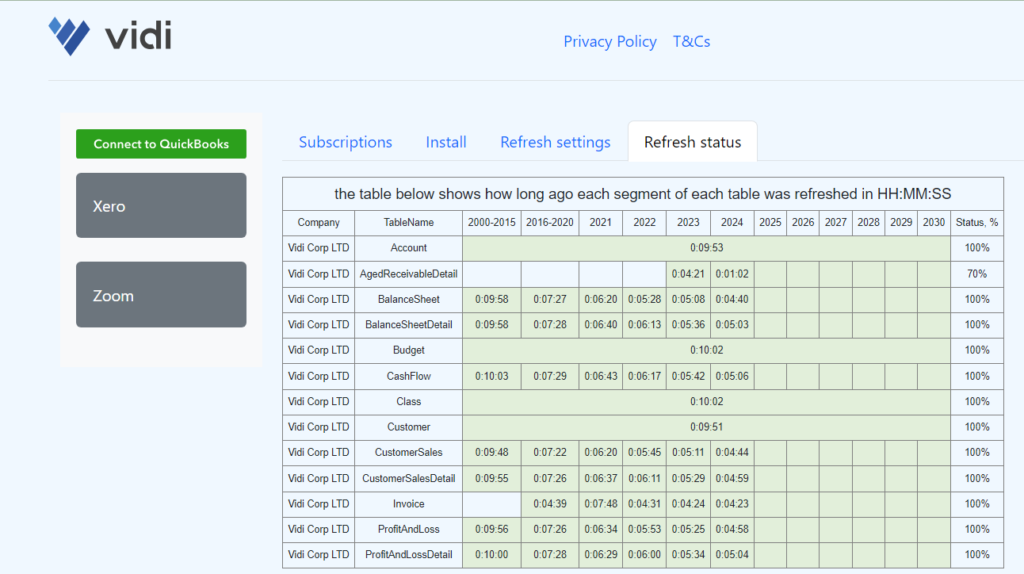
Our QuickBooks connector has ~50 tables in total, however not all of them are loaded by default. If you need additional tables, you can navigate to the “refresh settings” menu and select the tables that you need. Once selected click “apply changes” at the bottom to start loading your new tables.
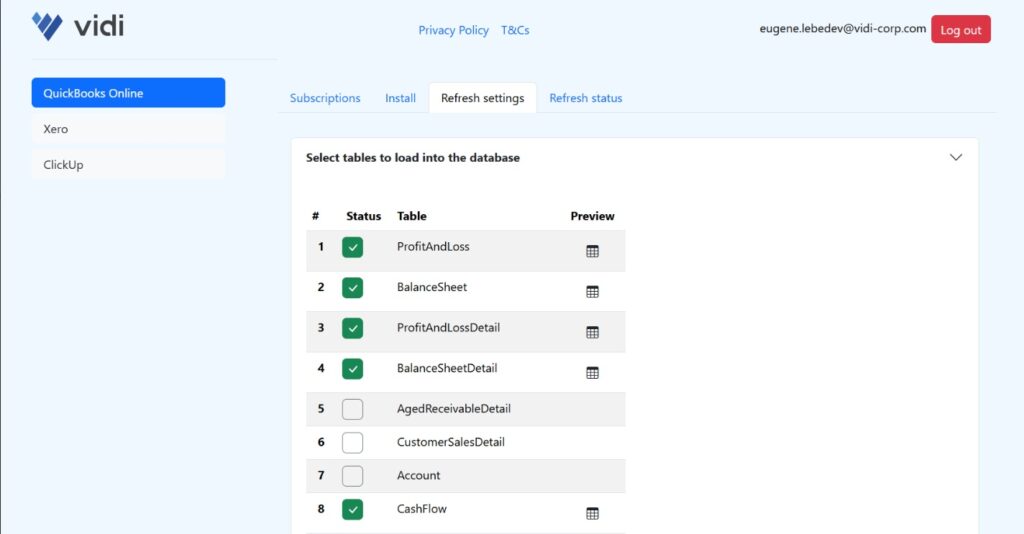
Finally, once your data is loaded, you can go back to the “Install” tab and press the “send database connection string”.
Once you press the button, an email will be sent to your registered address which will contain the necessary details for the connection. The details that you will need from here from this email are server name, database name, user ID and password.

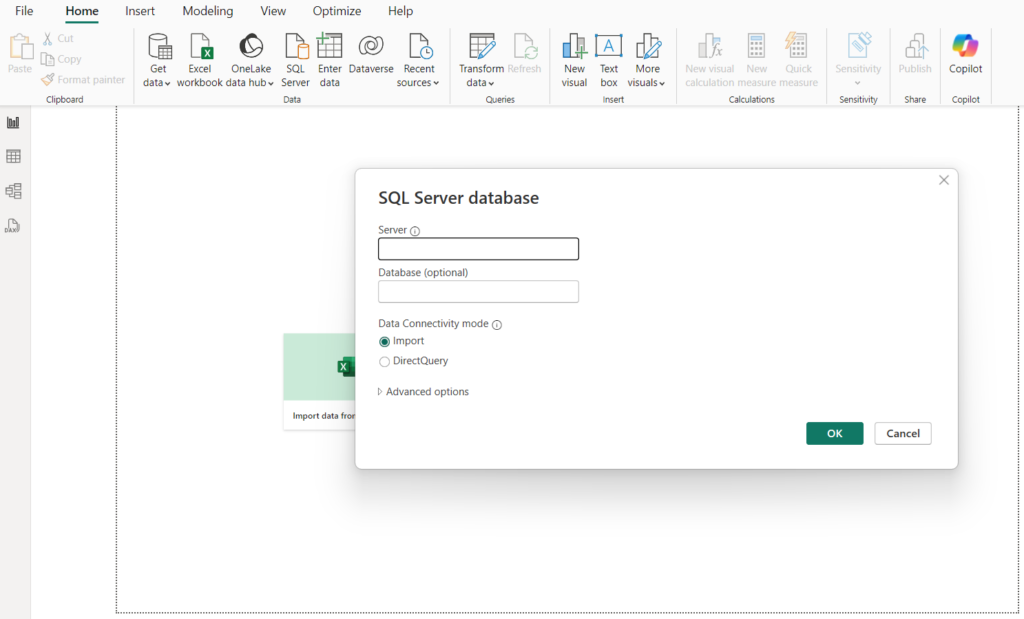
Open Power BI and click get data. You will be able to search for a data source and select Azure SQL Server. Once you get the popup menu, simple enter the server name and the database name from the email.
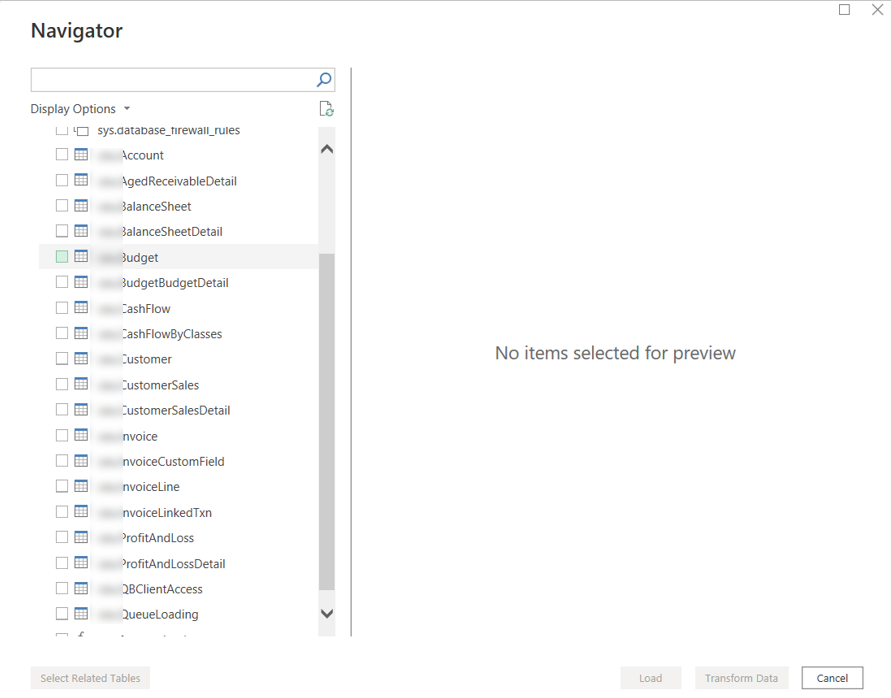
You will then need to select the tables that you want to extract into the dashboard
The main advantage of the connector is that the data format is extremely convenient. Let me show you the P&L Detail table for example.
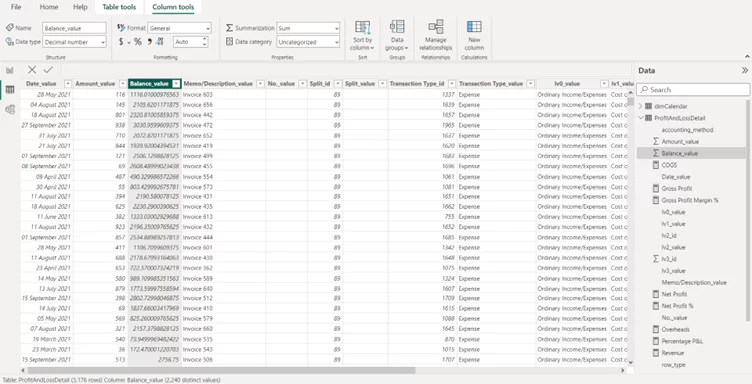
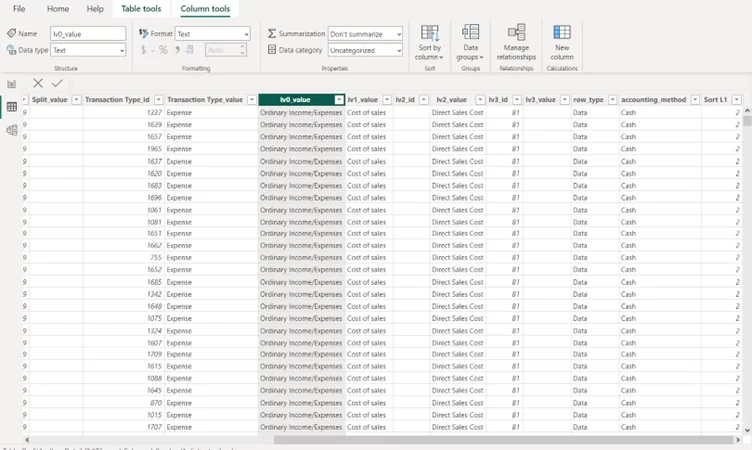
As you can see, everything is in one table:
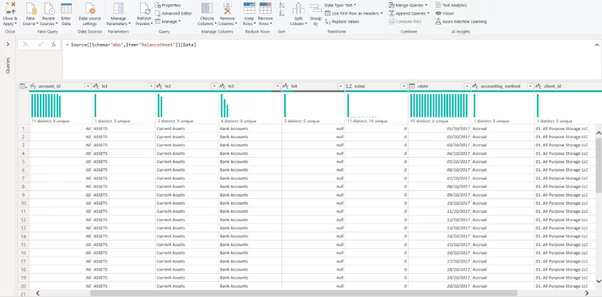
The data structure is the same for the Balance Sheet table (this is a screenshot from a different project)
Along with our connector we also offer a free QuickBooks Power BI Template that visualises the P&L, Balance Sheet and Cash Flow statements. The template allows you to select the accounting method for viewing your financial statements, filter by QuickBooks Online account and drill down to specific transactions.
You will find the instructions on how to install our free QuickBooks Power BI template here.
The QuickBooks Online connector is available in Power BI by default. The software is currently in Beta phase. This means it may be a bit unstable. However, it is still a good option for retrieving data from QuickBooks Online.
This is a really good option if you want to pull data from one or two tables.
Advantages:
Disadvantages:
To try out the QuickBooks Online connector yourself, follow the steps below to set it up.
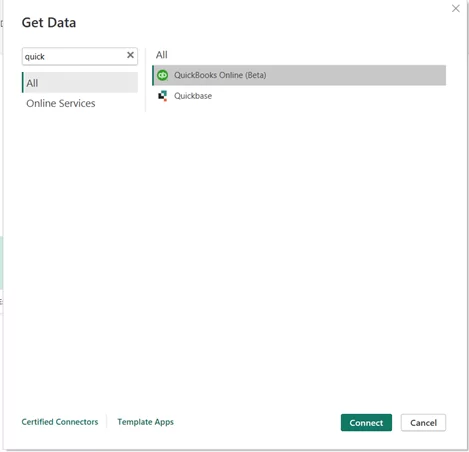
Once you type “QuickBooks”, Power BI will show the relevant connector to you. As you can see, the connector is currently in the Beta phase (it has been like that for about 3 years). Select it and then click “Connect”.
2. Once you click connect, the system will prompt you with a warning message. Click continue to navigate to the next screen.
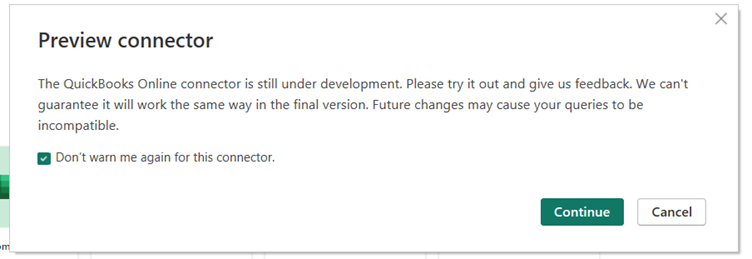
3. Once you accept the warning message, you will be prompted to the authentication window. Click “Sign in” to begin the authentication process.
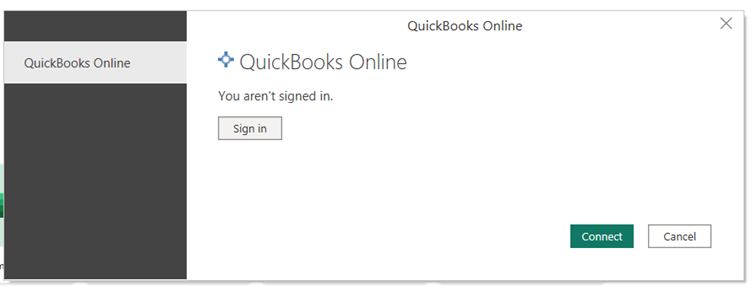
4. Enter your username and password. Once done, the authentication process will be completed!
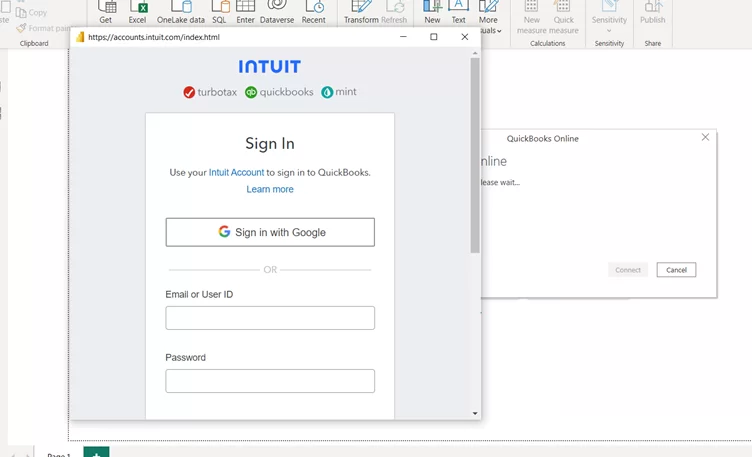
5. Select the tables that you want to load! As you can see, there are 113 available tables inside of this connector.
The QuickBooks Online connector in Power BI is helpful if you can quickly find the tables with your data. You can refer to the official QuickBooks API documentation to find out which data is inside of each table.
There are various methods to link QuickBooks Online with Power BI. One way is by using a native connector. You can also create your own connector for this purpose.
Having tried all of those, we would say that the integration that saved us the most time was our own connector. After all, consultant hours are a lot more expensive than software.
If you are interested in getting a demo of our connector, go through this link.