If you’re new to SharePoint, think of it as a website builder that helps teams share documents, track tasks, or create internal portals. To make these pages work the way you want, SharePoint gives you small building blocks called web parts.
Web parts are like little apps or tools you can add to a SharePoint page. They help you show information like documents, calendars, videos, charts, or announcements without writing any code.
In the following section, we will understand each type of SharePoint web part in detail:

1. Modern SharePoint Web Parts
Modern web parts are the newer, easier, and mobile-friendly version of web parts. These are used in modern SharePoint pages and work well with Microsoft 365 tools.
Key Features:
Examples: Document library, Quick links, Image gallery, YouTube video, Power BI report.
2. Classic SharePoint Web Parts
Classic web parts were used in older versions of SharePoint. They are still supported but are slowly being replaced by modern web parts.
Key Features:
Examples: Content Editor, Image Viewer, Page Viewer.
3. Custom SharePoint Web Parts
Sometimes, the built-in web parts (modern or classic) aren’t enough. You may want to show your company’s CRM data, a custom chart, or a special form. That’s where Custom web parts come in.
These are specially developed tools using SharePoint Framework (SPFx) and other web technologies like JavaScript and TypeScript.
Key Features:
Let’s see the comparison between these Web parts based on different aspects as follows:
| Aspect | Classic | Modern | Custom |
| Rendering | Server-side (runs on SharePoint servers) | Client-side using SPFx (runs in browser) | Client-side using SPFx or JavaScript |
| Mobile Support | Limited; not mobile-friendly | Built-in mobile responsiveness | Fully responsive on all devices |
| Customization | Uses XML and property panes | Simple UI settings for easy changes | Full control via coding and custom logic |
| Deployment | WSP files with central admin tools | SPFx packages via App Catalogue | SPFx via App Catalogue or other platforms |
| Security & Governance | Handled at the server level | Managed via Microsoft 365 admin centre | Requires extra attention to secure custom code |
| Integration with M365 | Limited | Seamless integration (Teams, OneDrive, Power BI) | Deep integrations are possible with APIs and Microsoft Graph |
| Development Skills Needed | Not always required, prebuilt parts used mostly | No coding needed, just configuration | Not always required, prebuilt parts are used mostly |
| Use Case | For legacy setups or older systems | Best for Microsoft 365 environments | Ideal for custom business needs |
Adding a web part to a SharePoint page is a standard process, no matter what type of web part you are using. In this section, we’ll walk through how to add a web part to a SharePoint page using a real example.
We have a sales report already published in a Power BI workspace, and we’ll embed that report into our SharePoint page using the Power BI web part. Let’s go through the step-by-step process below.
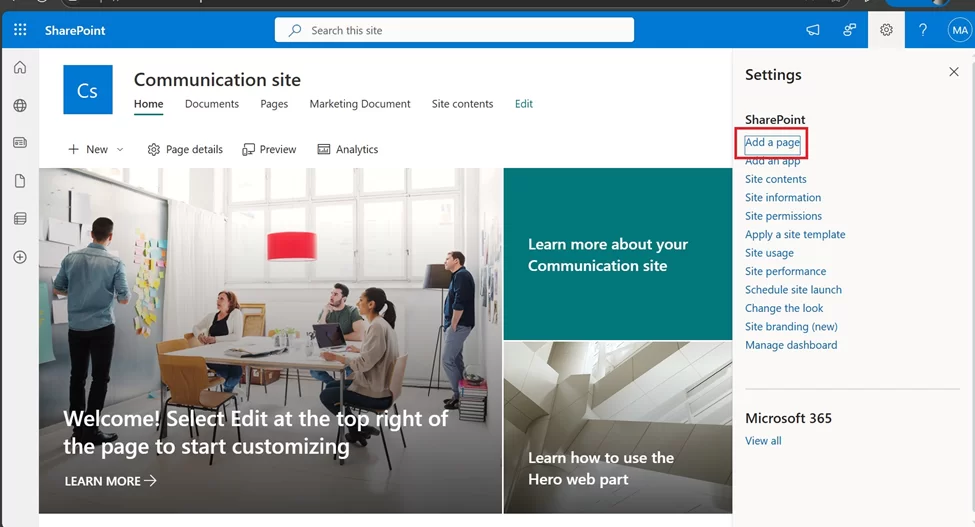
Step 1: Create or open a SharePoint Page
A web part can only be added to a SharePoint page. You can either use an existing page or create a new one:
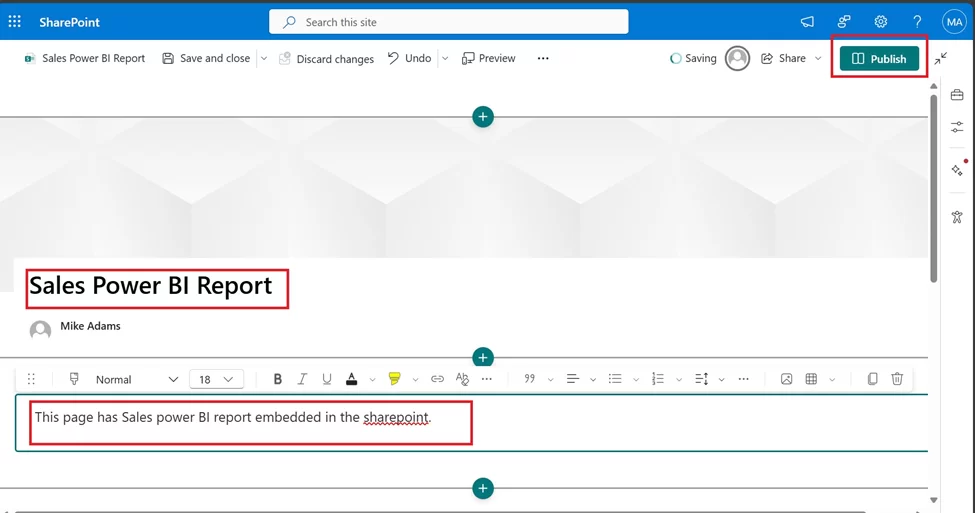
Step 2: Enter Page Details
A window will open asking for page details.
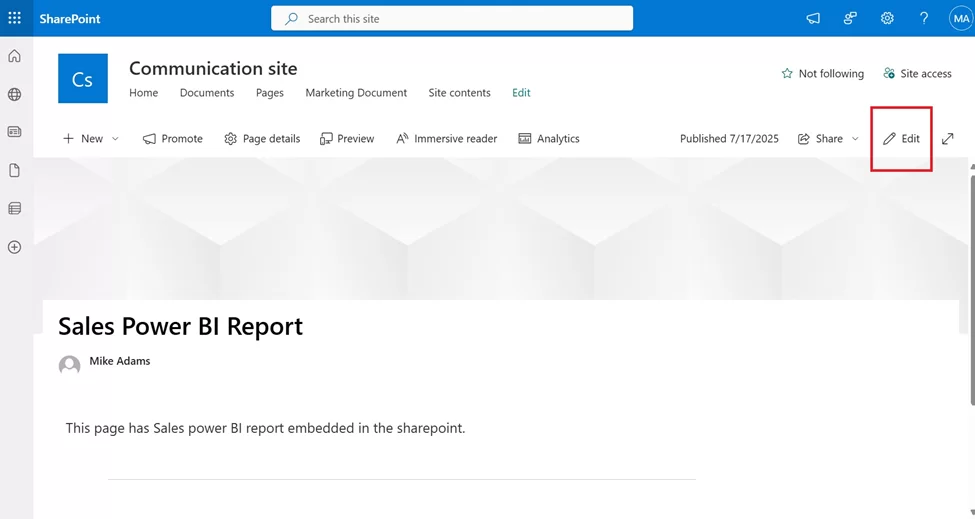
Step 3: Edit the Page
Now, go to the page you just created (or an existing one).
Step 4: Add a Web Part
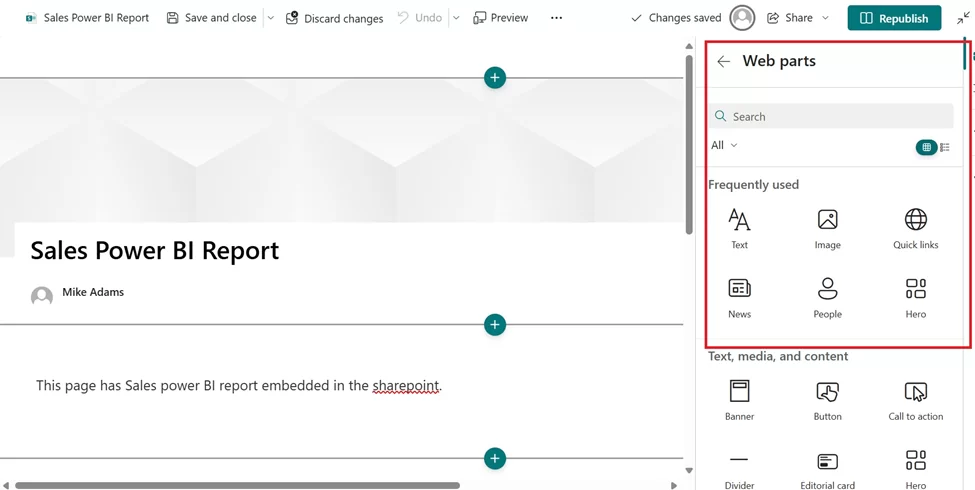
Step 5: Search for the Power BI Web Part
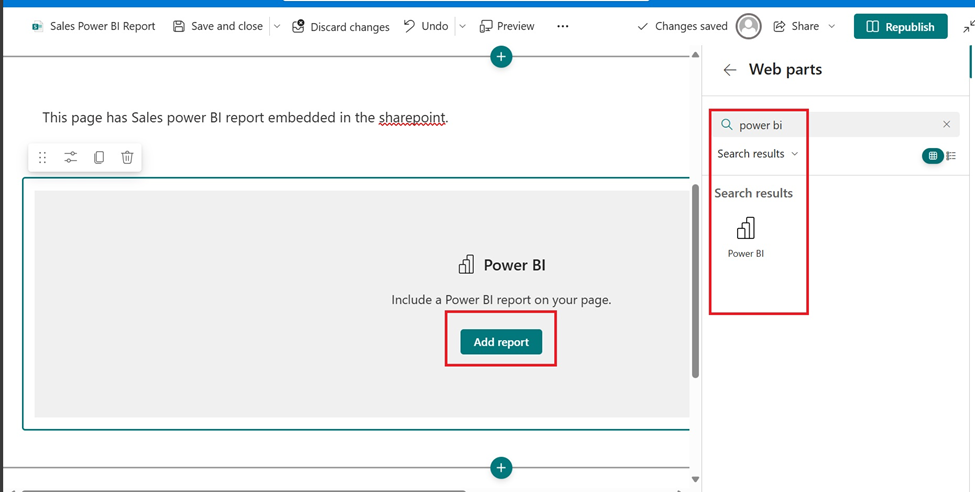
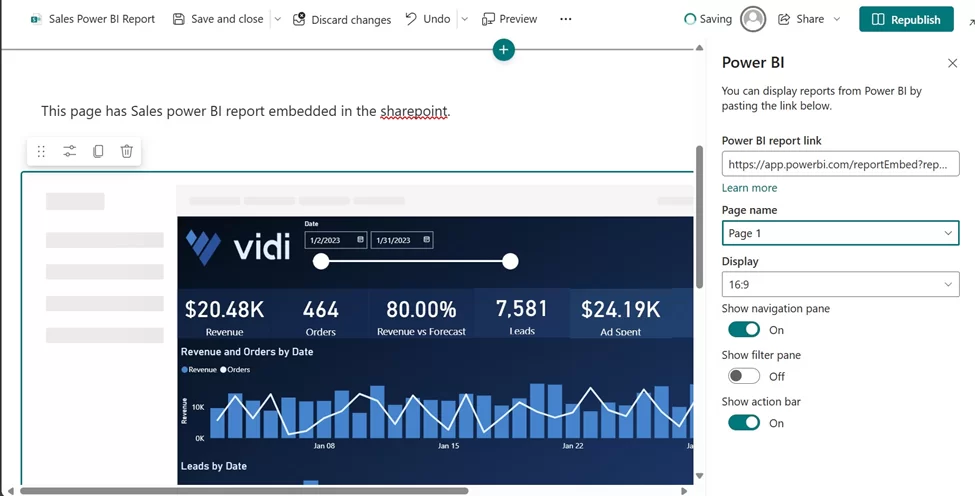
Step 6: Embed the Report
Not sure how to get the embed link? Refer to the article 6 Ways to Share a Report in Power BI with Anyone to learn how to generate it.
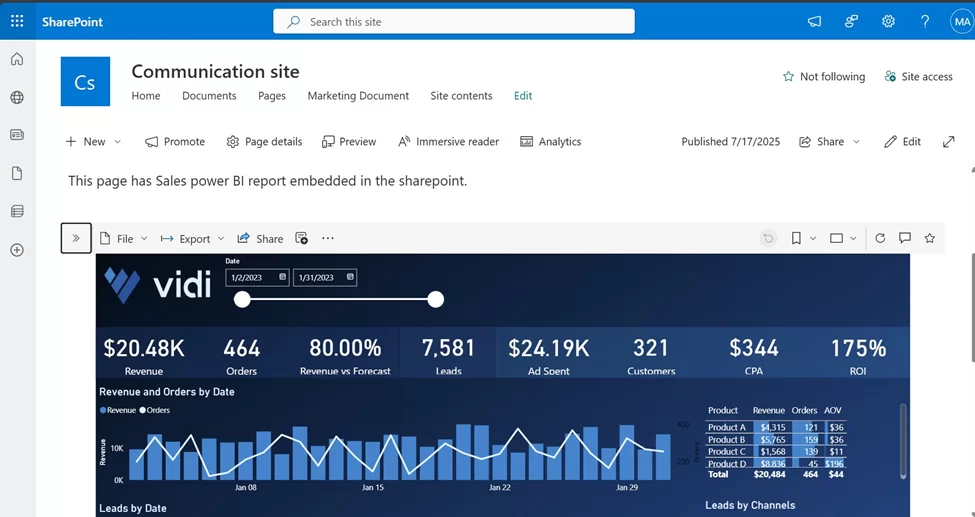
Step 7: Republish the Page
Once the report is added and the settings are done:
We have seen the example of the Power BI web part, but there are some other common, useful web parts available as follows:
| Web Part | Description |
| Text | Add and format text like paragraphs, headings, and bullet points |
| Document Library | Display documents from a SharePoint document library. |
| Embed | Embed content from external sites (like YouTube, Google Maps, etc.) via URL or code |
| People | Showcase team members or contacts with profile pictures and roles |
| Stream | Embed videos hosted on Microsoft Stream (modern version). |
As we already defined earlier in this article, a Custom Web Part in SharePoint is a tailor-made building block you can add to a SharePoint page to show specific content or functionality. While SharePoint has many built-in web parts (such as document libraries or calendars), organisations sometimes need something unique, like integrating a CRM system, displaying custom reports, or creating interactive tools. That’s where custom web parts come in.
In this section, we will understand the high-level steps of the custom web part implementation in SharePoint:
1. Identify the Requirement
Before anything is built, it’s important to define what you need the custom web part to do, such as showing data from another system, displaying a custom form, or creating a visual dashboard.
2. Share the Idea with a Developer
Once you know what you need, explain it clearly to a SharePoint developer what data should appear, how it should look, and how users should interact with it.
3. Design & Develop the Web Part
The developer will now build the web part using tools like SharePoint Framework (SPFx), JavaScript/TypeScript, and optionally React, depending on the complexity. They create the functionality and user interface based on your requirements.
4. Test the Web Part
Before making it live, the developer will test it on a local development environment to check if everything works smoothly, including layout, buttons, data, responsiveness, etc. This helps catch any errors early and ensures a better user experience.
5. Package and Deploy to SharePoint
After testing, the developer will bundle the web part into a package and upload it to SharePoint’s App Catalogue, making it available to use across your SharePoint sites.IT may review and approve it for security and compliance.
6. Add the Web Part to a SharePoint Page
Once deployed, any site owner or editor can go to a SharePoint page, click Edit, then click the + button, and add the new custom web part just like any other built-in part. It can then be configured or styled according to the page design.
7. Review and Launch
Finally, test the web part on the actual SharePoint page with your team, collect feedback, and make any last-minute adjustments before publishing it live for everyone to use. This ensures the web part meets your needs and works as expected.
To develop a custom web part in modern SharePoint, developers use a toolset called the SharePoint Framework (SPFx). Here’s what is typically involved:
Let’s see some of the major Use cases with examples for Custom web parts in SharePoint:
| Use Case | Description | Example |
| Data Visualization | Show data in charts or dashboards | Embed a custom sales dashboard from Power BI |
| Third Party Integration | Connect with external systems | Display customer records from Salesforce inside SharePoint |
| Task Management | Create Interactive Workflows | A custom approval tracker for leave requests |
| Custom Forms | Collect user data in a specific format | A feedback form that submits directly to a backend system |
| Live Widgets | Show real-time content | Weather or stock updates via API. |
Let’s go through some of the best practices to follow when implementing a custom web part in SharePoint. These tips will help ensure your web part is easy to use, performs well, and fits smoothly into your SharePoint site.
1. Plan Before You Build
Think about what your web part should do. Is it showing a report? Connecting to data? Or adding a custom feature? Having a clear goal saves time and effort later.
2. Use the Right Tools
Custom web parts are built using a tool called SharePoint Framework (SPFx), which works well with SharePoint Online. Make sure your developer is using SPFx and modern tools like Visual Studio Code.
3. Keep It Simple for Users
Design the web part in a way that is easy to use and looks clean. Add buttons, text, and layout that people understand. Avoid too many options or technical settings for end users.
4. Make Sure It Works on All Devices
Your custom web part should look good and work properly on mobile phones, tablets, and desktops. Test it on different screens to make sure it’s responsive.
5. Follow SharePoint Style and Layout
Try to make your custom web part match the overall SharePoint look and feel. This makes your site feel consistent and professional.
6. Secure Any Data Connections
If your web part pulls in data from outside sources (like an API or a database), make sure it’s secure. Use proper authentication methods and never expose sensitive information.
7. Use Version Control
Keep track of changes made to the code or design using version control systems like Git. This helps you roll back if something goes wrong later.
In this article, we explored SharePoint web parts, their evolution from classic to modern, and how they help build dynamic pages. We also walked through the process of adding a web part to a SharePoint page and examined how custom web parts can be developed to meet specific business needs, along with real-world use cases.
If you’re looking for support with SharePoint development or need a custom web part tailored to your organisation, feel free to reach out to Vidi. Their team of experts can help you design and build the right solution for your business.
A web part is a building block you can add to a SharePoint page (like a document viewer or image). An app part refers to adding a SharePoint app (like a calendar or custom app) as a web part usually more powerful and sometimes developed separately.
Go to your SharePoint page, click Edit, then click the “+” button to see available web parts. Choose the one you want, configure it, and click Publish to save the changes.
Common web parts include Document Library, List, Quick Links, Hero, Text, and Image. This help display content, add navigation, or share updates.
Yes, you can use the Embed web part to add external website content using a secure embed code (like YouTube videos or dashboards). Just make sure the site supports embedding.
Yes, most modern web parts allow basic layout and style changes. For full customisation, you can build a custom web part using SharePoint Framework (SPFx).
Yes, if built properly using modern tools like SPFx, custom web parts are fully responsive and work well on phones and tablets.
Yes, web parts can be reused across different pages. You just need to configure them for each use or create templates for consistent setup.
SPFx is a modern development model used to build custom web parts and extensions in SharePoint. It’s based on JavaScript and works well with Microsoft 365.
![]()
![]()
![]()