Have you been wondering how to share a Power BI report with an external users without a license?
Power BI is a great tool for sharing reports among your colleagues within the same organisation. However, what if you need to share Power BI reports outside of your organization, for example with your customers?
There are 3 ways to share Power BI reports to free users without a license:
| Power Pages | Public Link | Export To PDF | |
| Advantages | – Data security – User-friendly – Login menu can be fully branded to your company | – Quick and easy | – Can be emailed on a schedule |
| Disadvantages | – Takes time and skill to configure | – Anyone with the link can access your data – Links are indexed by Google and can be discovered through search – Links can be forwarded | – Sharing a static file rather than an interactive dashboard – File can be forwarded to anyone which is not secure |
| Licensing Needed | Power Pages License, optionally Microsoft Fabric | Power BI Pro | Power Automate Cloud Flow |
| Cost | $180-340 per month | $14 per month | $15 per month |
The specific approach you choose depends on balancing the cost with data security. The most secure approach is sharing Power BI reports through a Power Pages portal. The other approaches are less secure but they are cheaper.
In this article we will cover the step-by-step instructions for how to share Power BI reports with external users without a license using each of these approaches.
Sharing Power BI reports with external users via Power Pages relies on the following technologies.
The following are pre-requisites for building the Power Pages portal for sharing Power BI reports.
This approach has multiple advantages:
The only real disadvantage is the development and licensing cost. It takes about 30 working hours to develop the Power Pages portal and you need a Power Pages license which is $180 per month. In some cases you might also need a Microsoft Fabric license which is $160+ per month.
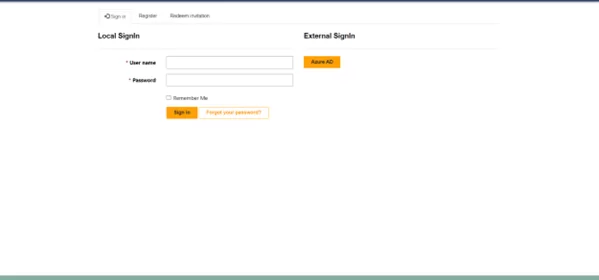
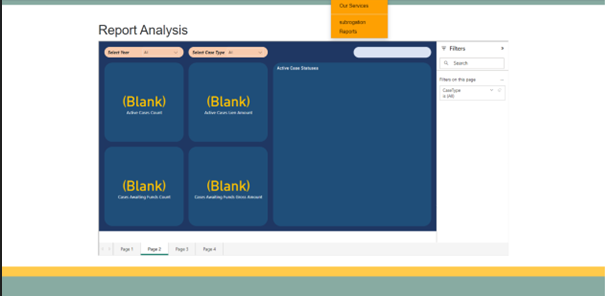
When you sign in to Power Pages click on the “New Site” button to initiate the creation of your Power Pages site. You can create the necessary pages using out-of-the-box web parts for a quick setup or opt for custom development using Visual Studio for more tailored solutions. Power Pages portals usually have a sign in screen and a page that displays a Power BI report.
When an external user visits the portal, they will be greeted with a registration screen designed to capture their details. This screen serves as the initial point of interaction, ensuring that only authenticated users can proceed further.
Once your users register, we can save their details to a “contact” table inside of dataverse. We can use this table for row-level security afterwards.
You have 2 options to restrict the content based on who is logged in: assigning web roles in Power Pages or row-level security in Power BI.
Web roles in Power Pages are ideal if you have a low number of clients that need to access their dashboards. This approach involves some manual work but it requires no Microsoft Fabric licensing so it saves you $160+ per month. In this scenario you would manually create a new role for every new client and assign them to it.
Power Pages web roles allow assign users to perform special actions or access protected content on a site. You would use this to embed a new Power BI dashboard to a new page and then assign this page to a web role.
Another way you can secure your client data is by using row-level security in Power BI. In this scenario you would have a single Power BI report which is filtered accordingly depending on which user signs in.
To establish row-level security, start by opening the Power BI report in Power BI Desktop. Authenticate and load the contacts table from Dataverse, which contains all the user contacts created for access to this portal.
Once the contacts table is loaded into the data model, you will need to create a security role that filters the data based on the signed-in user. For example, you can create a rule that states whenever a user is signed in, the report should display only their relevant data. Follow the steps below to set up row-level security.
Step 1: Azure Portal Access
Ensure you have access to the Azure portal with an active subscription. This access is essential for setting up the resources required to embed Power BI reports that will be shared with external users who do not have a Power BI license. The Azure portal provides the necessary infrastructure and tools to configure and manage these resources effectively.
Step 2: Set up Power BI Fabric Capacity
Within the Azure portal, set up a Power BI Fabric capacity resource. This resource is crucial as it will be used to make the Power BI workspace premium. A premium workspace is necessary to enable sharing reports with users who do not have Power BI licenses.
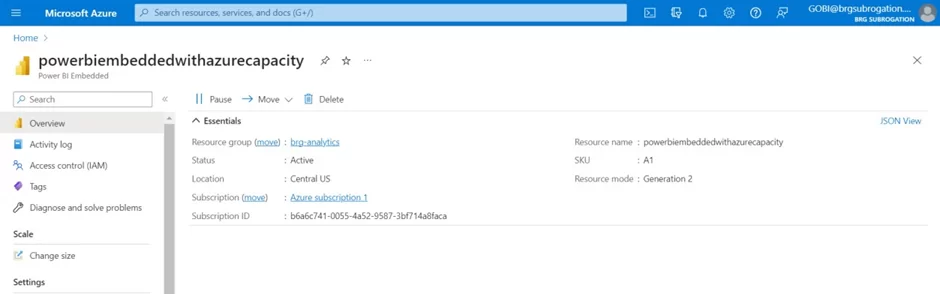
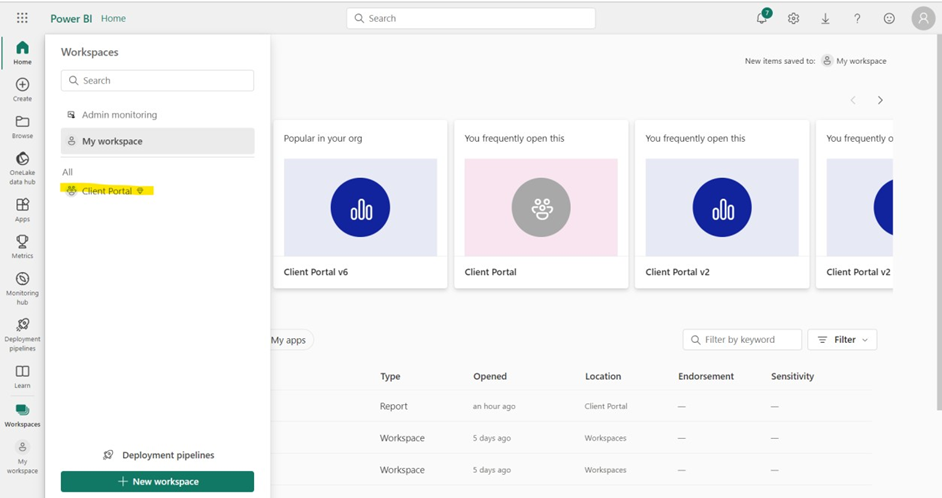
Step 3: Assign Embedded Capacity to Workspace
Assign the Power BI Fabric capacity to the workspace that will host the report to be embedded in the portal. Once the assignment is complete, the workspace will display a diamond icon, indicating it has premium capabilities. This step ensures that the workspace can handle the demands of embedding reports and sharing them with external users efficiently.
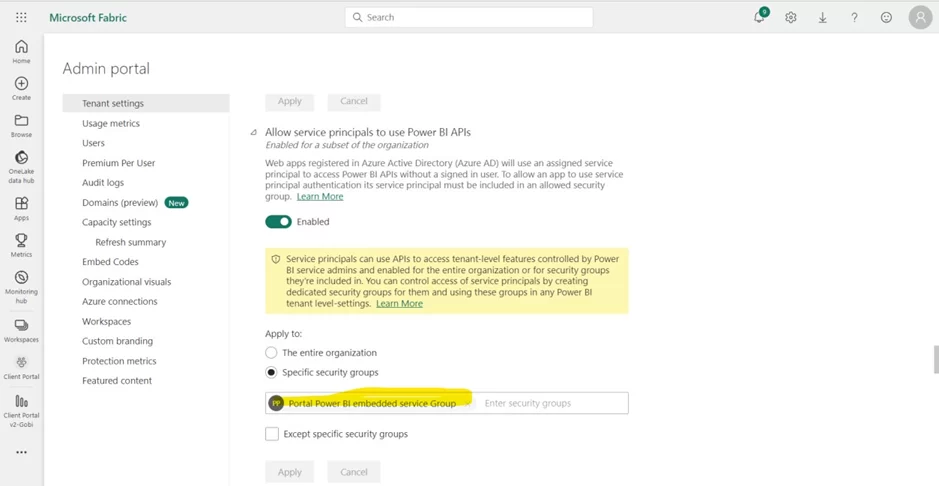
Step 4: Create Resource Group and Configure Authentication
Create a resource group in the Azure portal and add the Portal ID to this group. This grouping helps in managing and organising related resources efficiently. Next, set up authentication by allowing this resource group to use Power BI APIs in the Power BI admin portal. This configuration is crucial for enabling automated processes and integrations, ensuring that the embedded reports function seamlessly and securely.
Once you have designed the necessary pages in Power Pages, the next step is to set up the Power BI web part on the pages you want to display reports. Simply create a public embedded link and embed it within the Power BI web part as an iframe.
Once the user has successfully signed in, they will be redirected to the report page. Here, they can access and view reports.
As an administrator, you will need to access the Portal Management app. Here, you will create a new contact entry for the customer. After setting up the contact, generate a registration key for your portal and send it to the customer. This key is essential for the next steps, as it allows the user to authenticate their access.
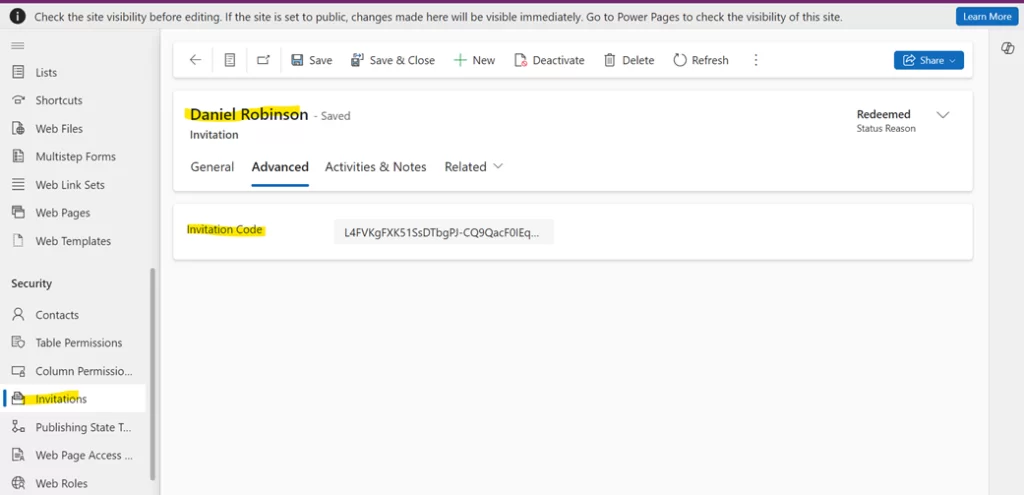
The user will click on the “Redeem Invitation” button on the portal’s registration screen. They will enter the registration key provided to them, which will enable them to create and set up their user account within your portal. This process involves the user entering their details and creating login credentials, establishing a secure and personalised user account.
The easiest way to share Power BI reports with external users is by generating a public link. It only takes a couple of clicks and you need a Power BI Pro license.
Start by publishing your Power BI reports to Power BI service. Once you do this open your report, go to file -> embed report -> publish to web (public). A pop-up menu will come up where you can copy a shareable link and an HTML code.
You can email the first link to anyone who needs to access the report. You can also use the HTML code to embed your Power BI report to a web page or a Power Pages portal.

The advantage of this approach is simplicity. It only takes a couple of clicks to share Power BI reports externally. However, there are a few problems with this approach:
As you can see, there are significant data security issues with this approach. If your data is sensitive you should think twice before choosing this approach. However, if you are analysing public data or data that can not be used to identify your organization, you can still consider this approach.
Another way to share your Power BI reports externally is to export them to PDF and then share to your users. You can export them manually or automatically via Power Automate.
To export your reports to PDF manually simply go to your report in Power BI Service and click on export -> PDF. You can then choose to export the whole report or only the current page. Once you finish your export you can forward the pdf file to your audience.

Alternatively you can build a scheduled Power Automate cloud flow that exports your Power BI reports to PDF and then sends them to your audience via email. We have a detailed guide on how to do this on our website.
You need a Power Automate cloud license to do this automation which costs $15 per month.

This approach has multiple advantages:
However, there are still multiple disadvantages:
Do you need help building your Power Pages portal or a Power Automate flow for sharing Power BI reports externally? Simply contact us today and our consultants will help you create these automations!
We have delivered 1000+ projects for 600+ international clients. We would be excited to bring our experience into your project!
![]()
![]()
![]()