
Eugene Lebedev is a Power BI consultant by background. Before founding Vidi Corp in 2021 he created Power BI reporting for Autodesk. His Power Bi reports were used by VPs of Finance and C-suite of Autodesk. As part of Vidi Corp, Eugene created dashboards for Google, Teleperformance, Delta Airlines and 200+ clients worldwide.
A custom connector in Power BI is a piece of code written in M which queries data from a data source. This M code usually sends requests to an API and then transforms the data that comes out of the API into a usable format.
Power BI custom connectors also provide a visual interface in order to select the tables you want to import. This would be an interface of a “Get Data” menu. Below is the video demonstration based on the custom connectors that we created for our clients at Vidi Corp.
If you want to create this kind of visual interface, you need to leverage the Power Query SDK inside of the Visual Studio. Here is the official Microsoft documentation on how to do this.
If you want to check whether you can create a custom connector in Power BI for your data source, try googling things like “Xero API documentation” or “Anaplan API documentation”. If you see some results with an official API documentation, it is possible to create a custom connector in Power BI.
When connecting to APIs in Power BI, we typically need to understand the API’s authentication mechanism, request/response structure, and any specific parameters required for data retrieval. Let’s go through this step by step.
1. API (Application Programming Interface): is a set of rules and protocols that allows different software applications to communicate and interact with each other. Every API defines the methods, data formats, and conventions that developers would use when building integrations.
2. JSON: When you send a request to an API, it usually returns data in JSON format. APIs use JSON to transmit and interpret data in a consistent and interoperable manner. JSON represents data as key-value pairs or as arrays of values. In Power BI terms we call it nested data. The basic building blocks in JSON are; Objects, Key and values.
2a. Objects: An object is an unordered collection of key-value pairs enclosed in curly braces {}. Each key is a string, followed by a colon :, and then the corresponding value.
2b. Arrays: An array is an ordered collection of values enclosed in square brackets [].
2c. Values within an array can be of any data type, including objects, arrays, numbers, strings, booleans, or null. Values: Values in JSON can be strings, numbers, booleans (true/false), null, objects, or arrays.
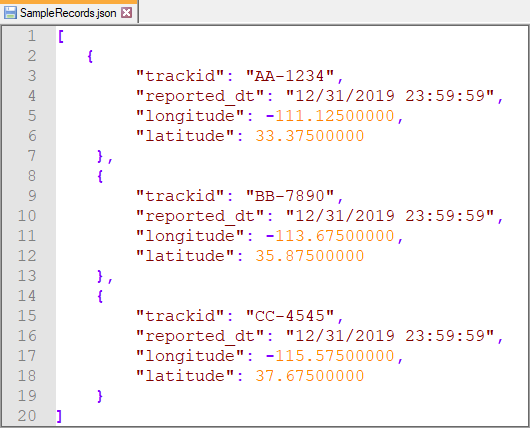
An example of a JSON file
In order to build a Power BI custom connector using a rest API, we should use the option to get data from the Web.
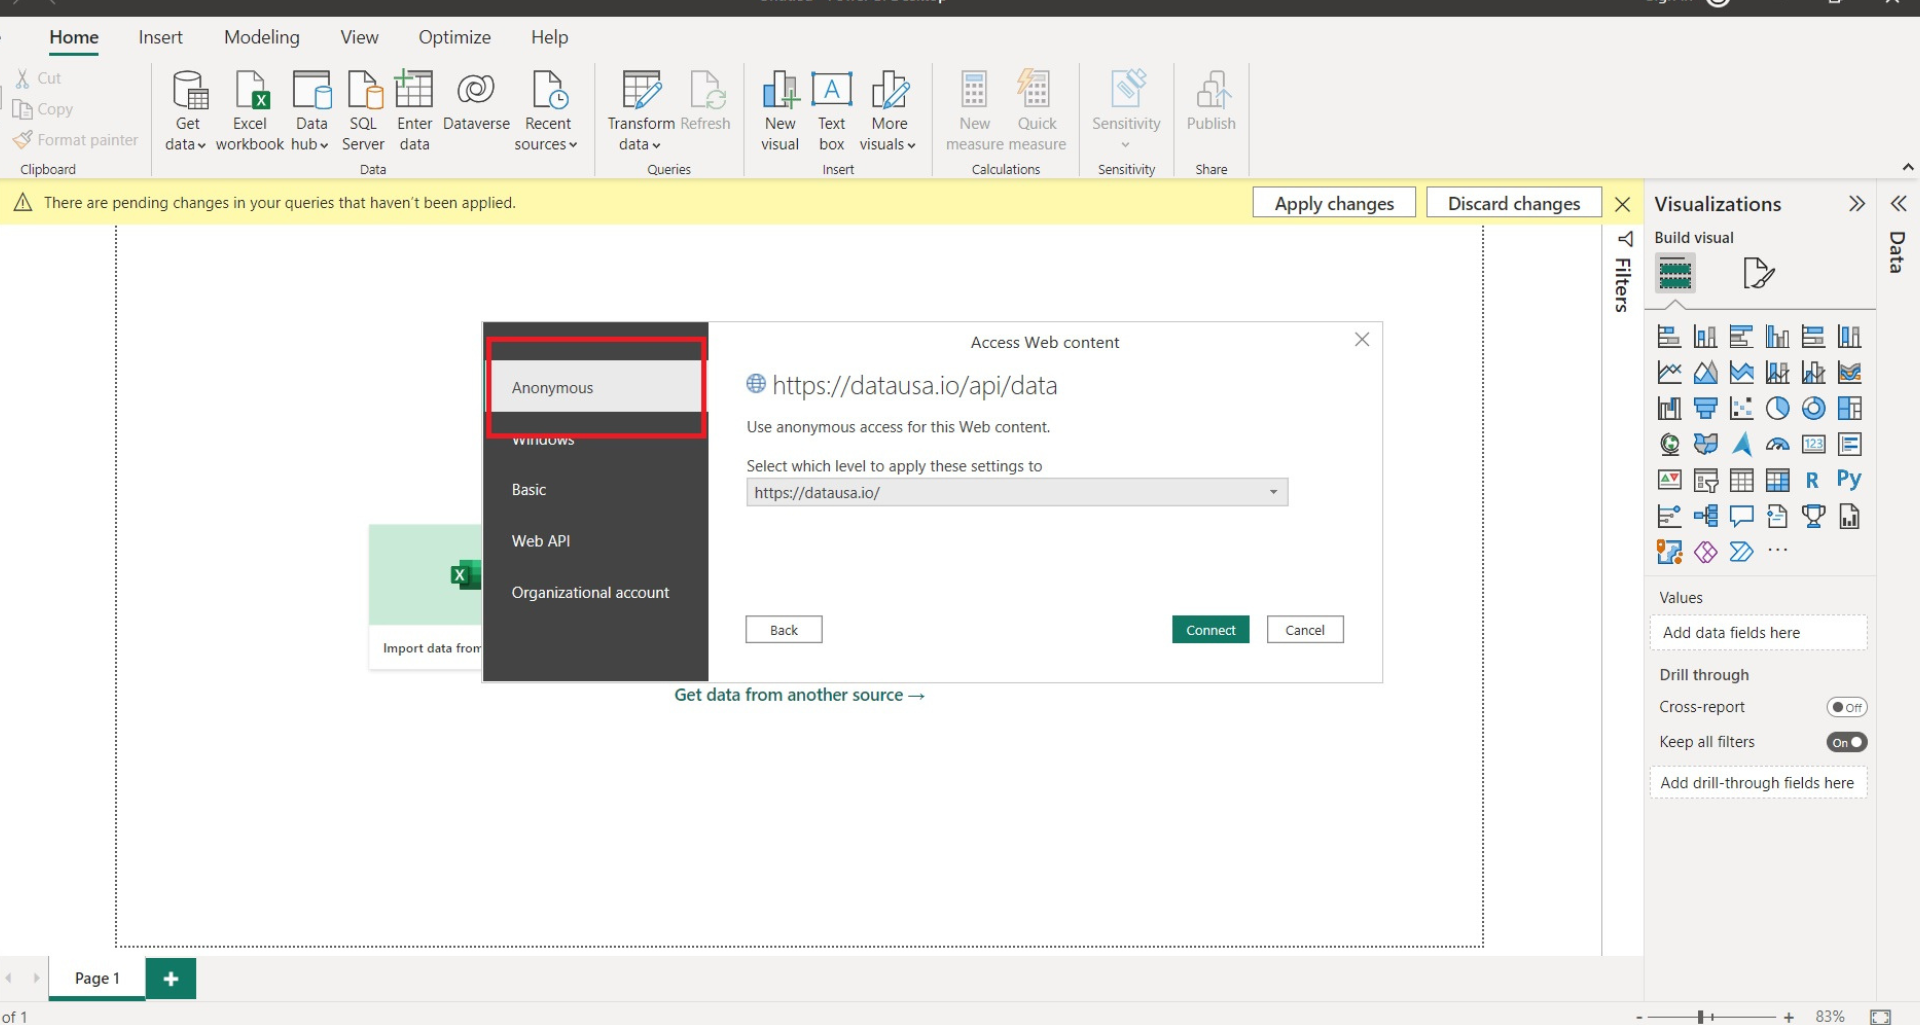
Each data source has its own authentication mechanism to allow users to consume the data. There are 4 common authentication methods:
Connect to an open API (No Authentication)
Let’s see how to get data from API source which requires no authentication.
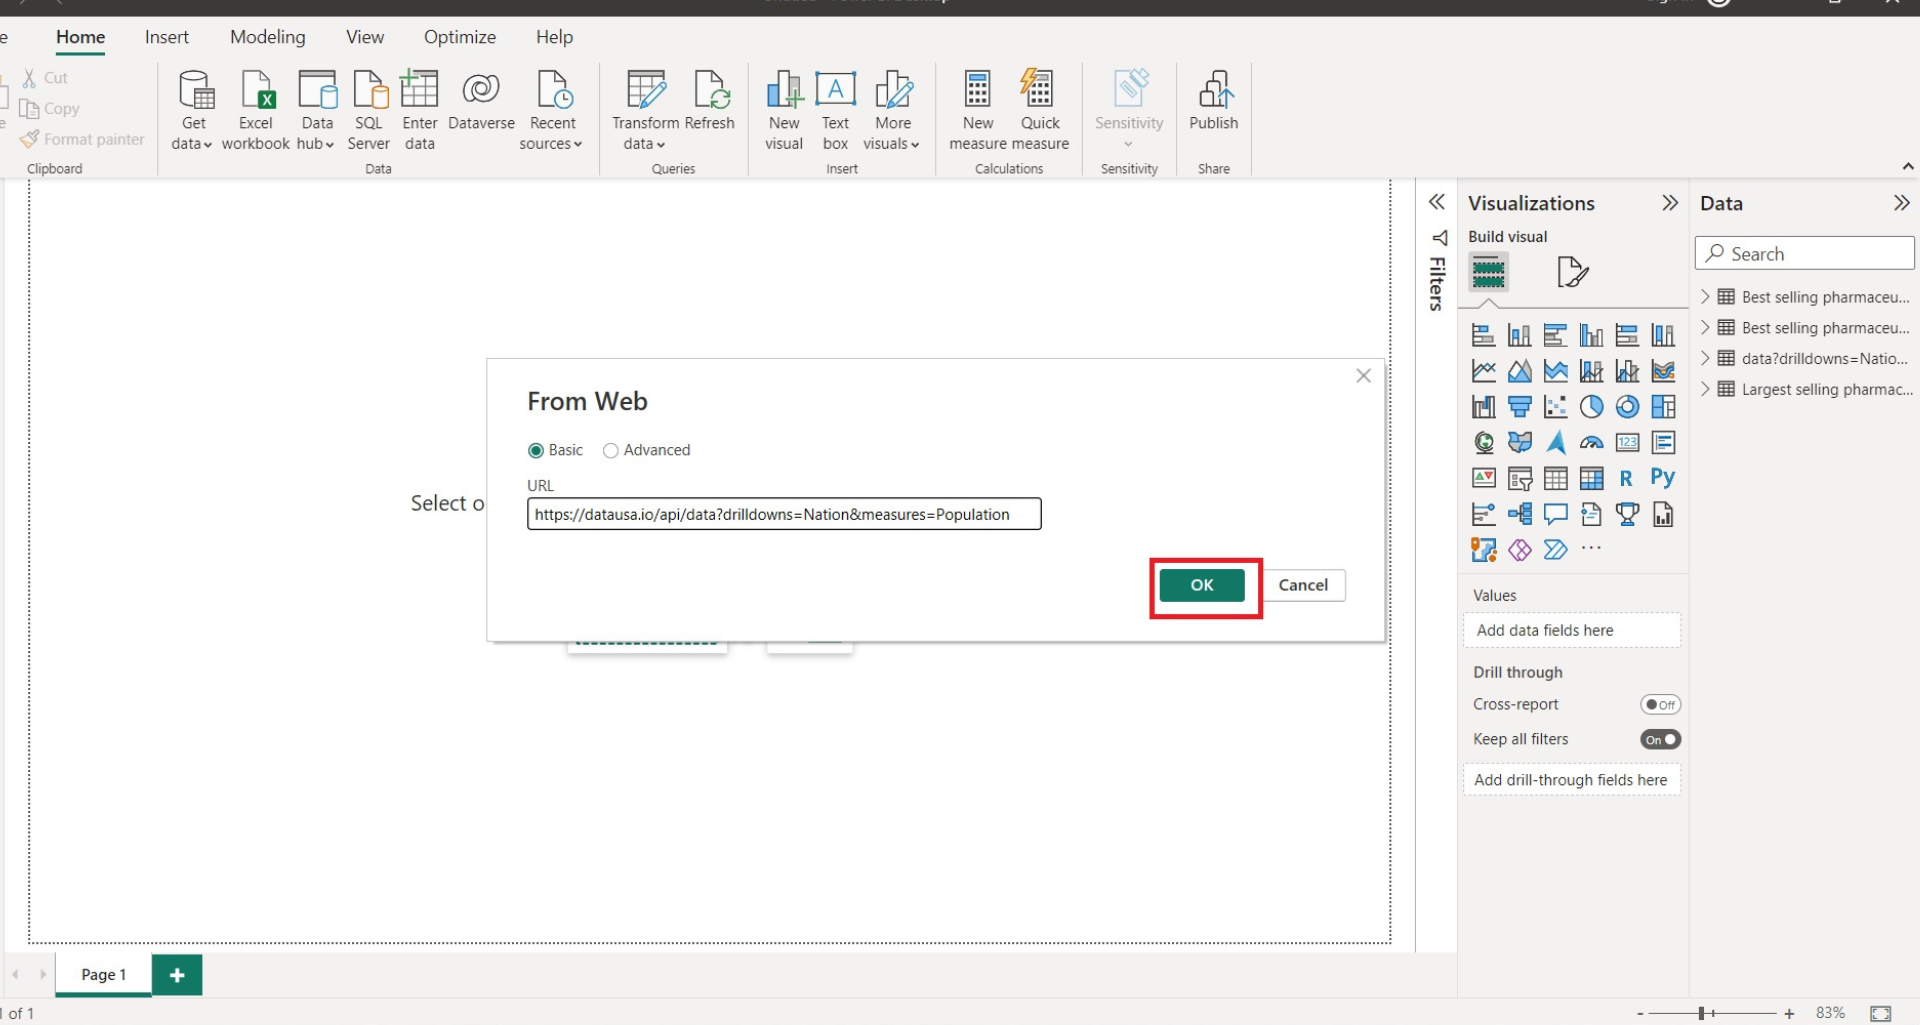
Open the Power BI desktop and click on ‘Get data’.

Select WEB connector from the list and provide API URL.
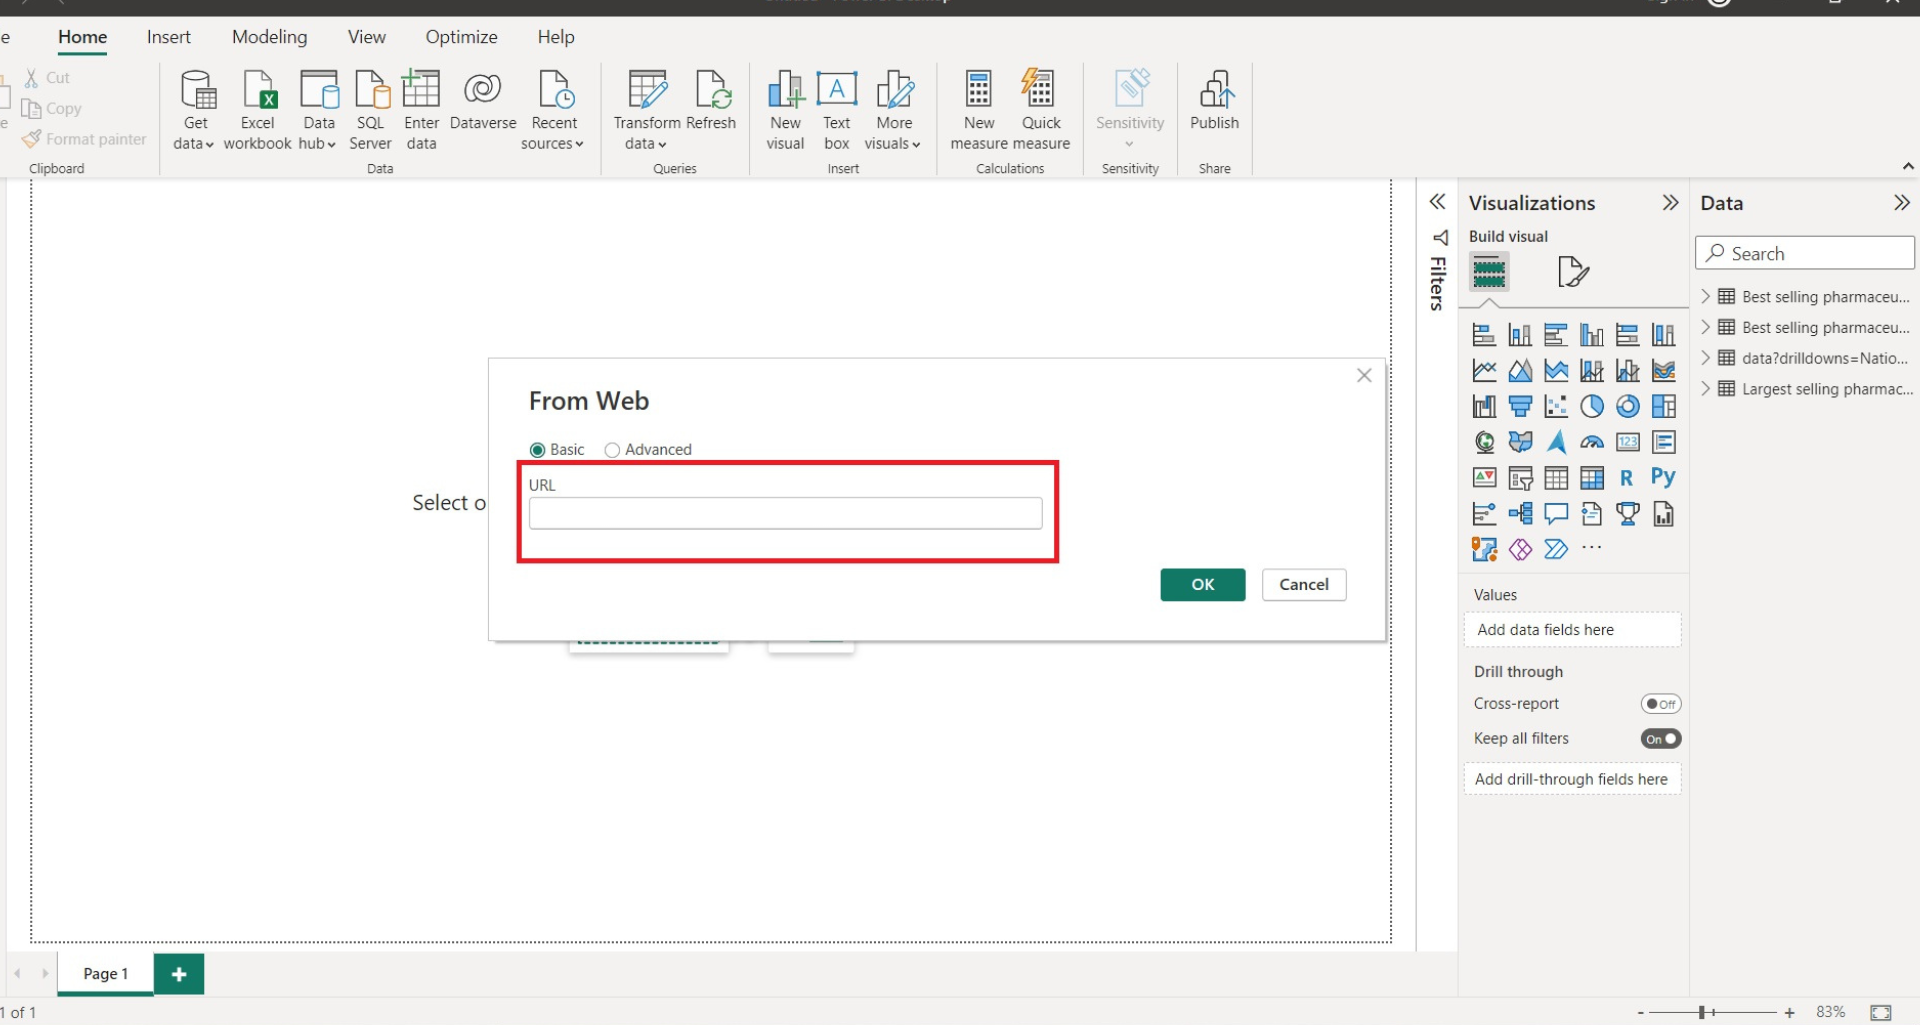
We are using datausa.io open API to demonstrate this example. There are a lot of sites which provide free API to test and consume data.
Some APIs rely on authentication using a bearer token. Our Power BI custom connector can send a provided bearer token in the headers to authenticate and to access the API data source. I will demonstrate what a header is later on in this article.
Bearer token should be valid and have access to the data source.There are 2 ways to pass a bearer token to Power BI:
This is a good option if your tokens don’t expire often. Some tokens have a lifetime of a year, some only live for 20 minutes. Everything depends on the specific Power BI you are working with. Let me demonstrate how to use a bearer token to authenticate to an API.
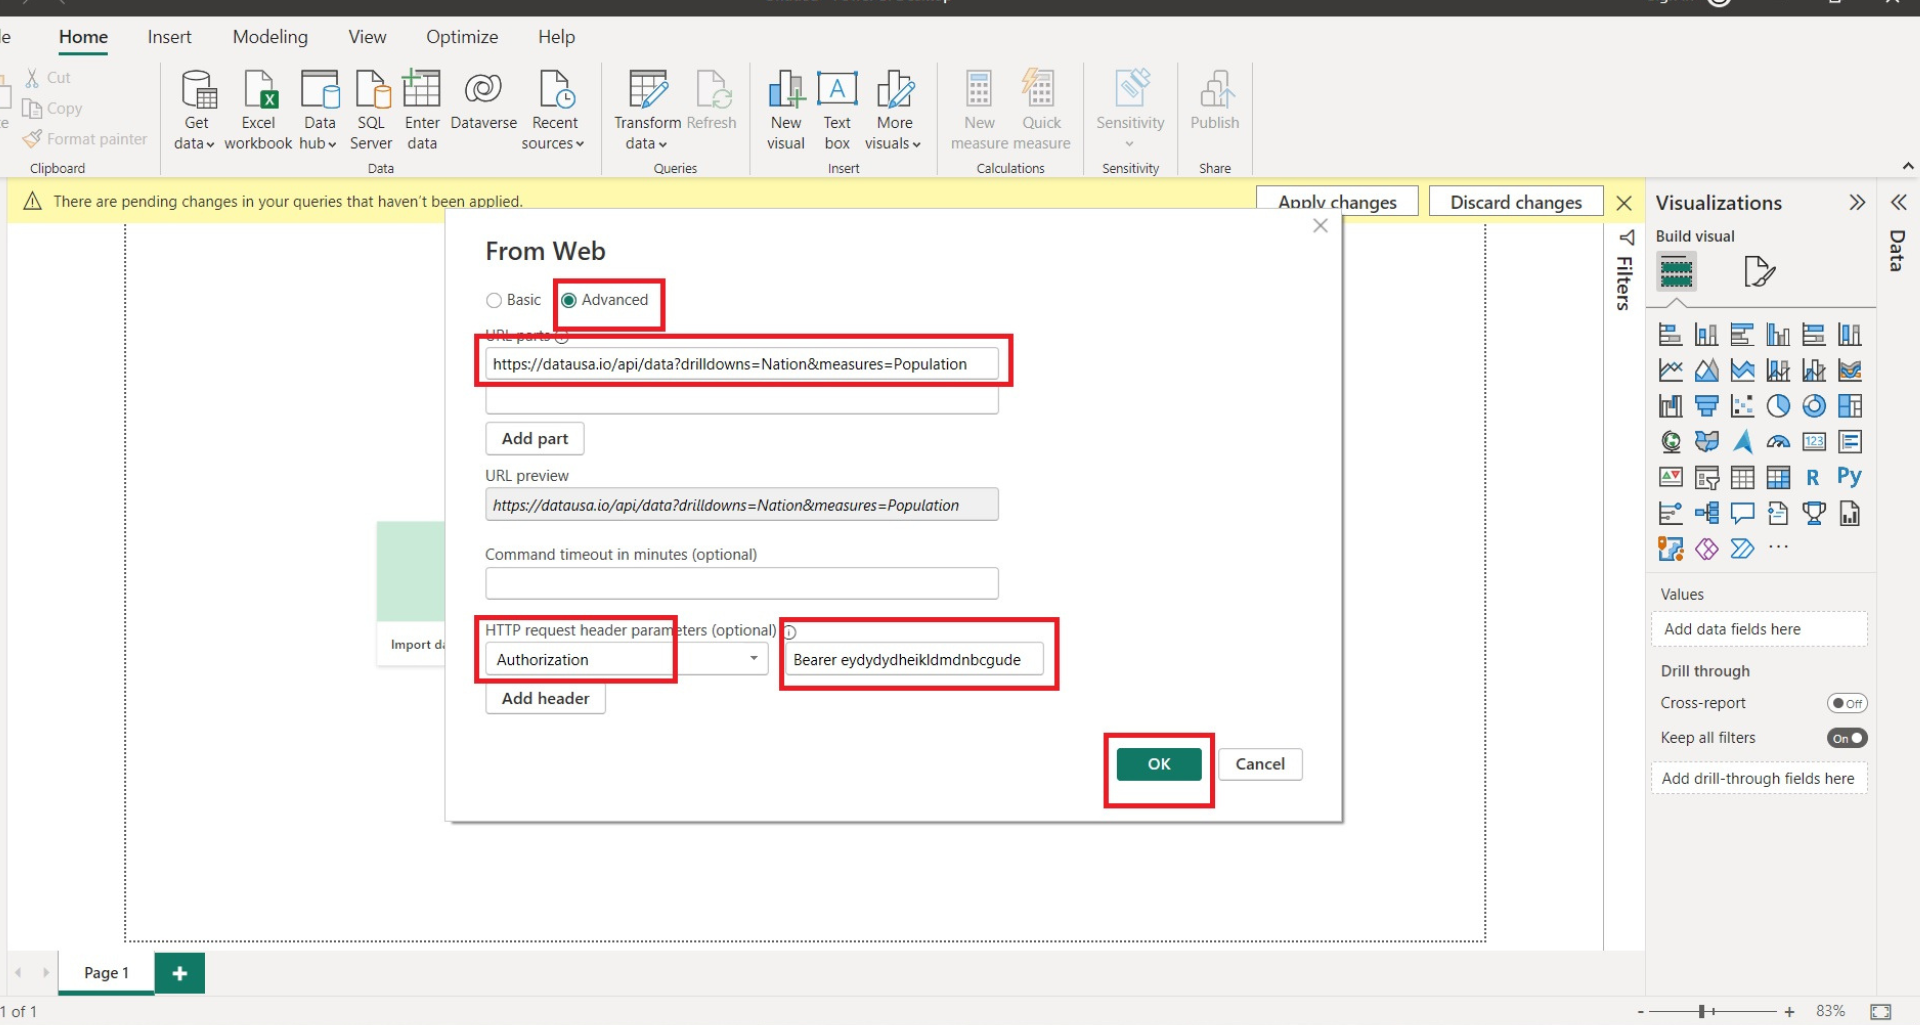
Open the Power BI desktop and click on get data. Select the WEB connector and provide your URL.
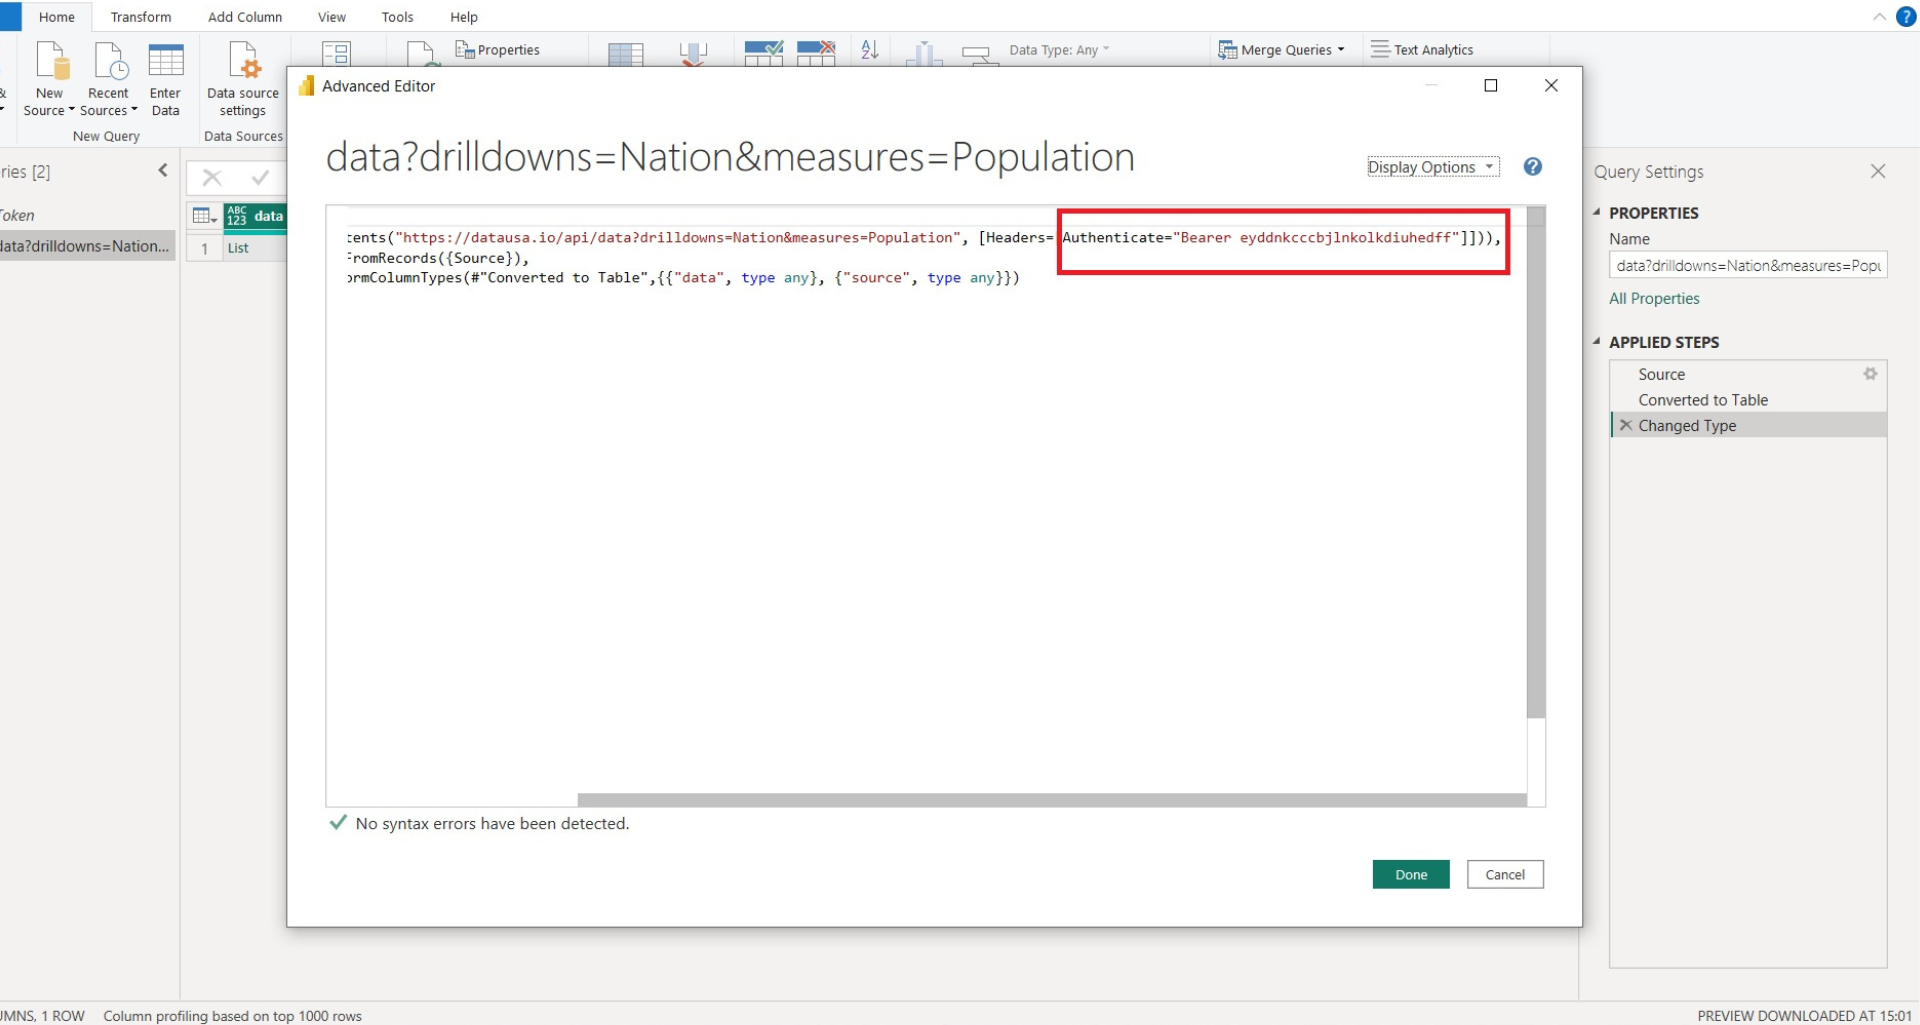
Select advanced and provide API Url to URL Parts. Add Authorization to the header and provide a token in the format (Bearer Token), click on ok to proceed.
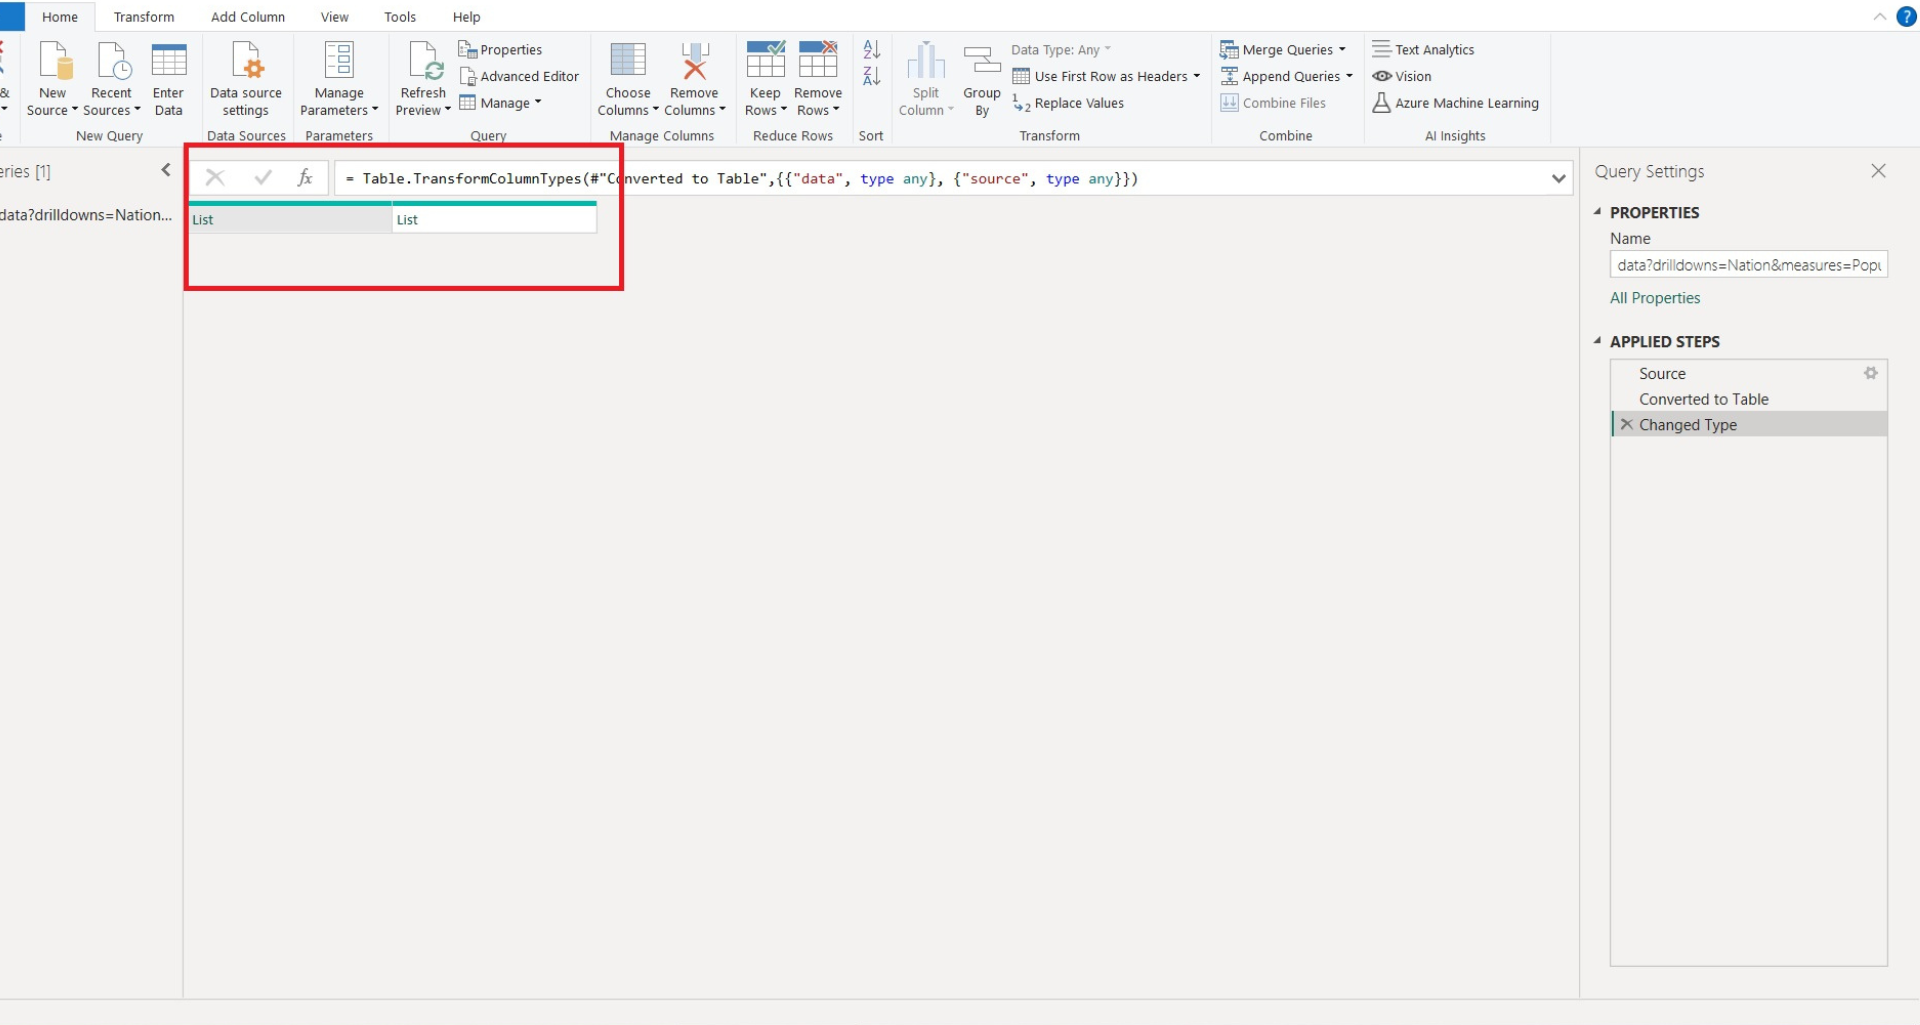
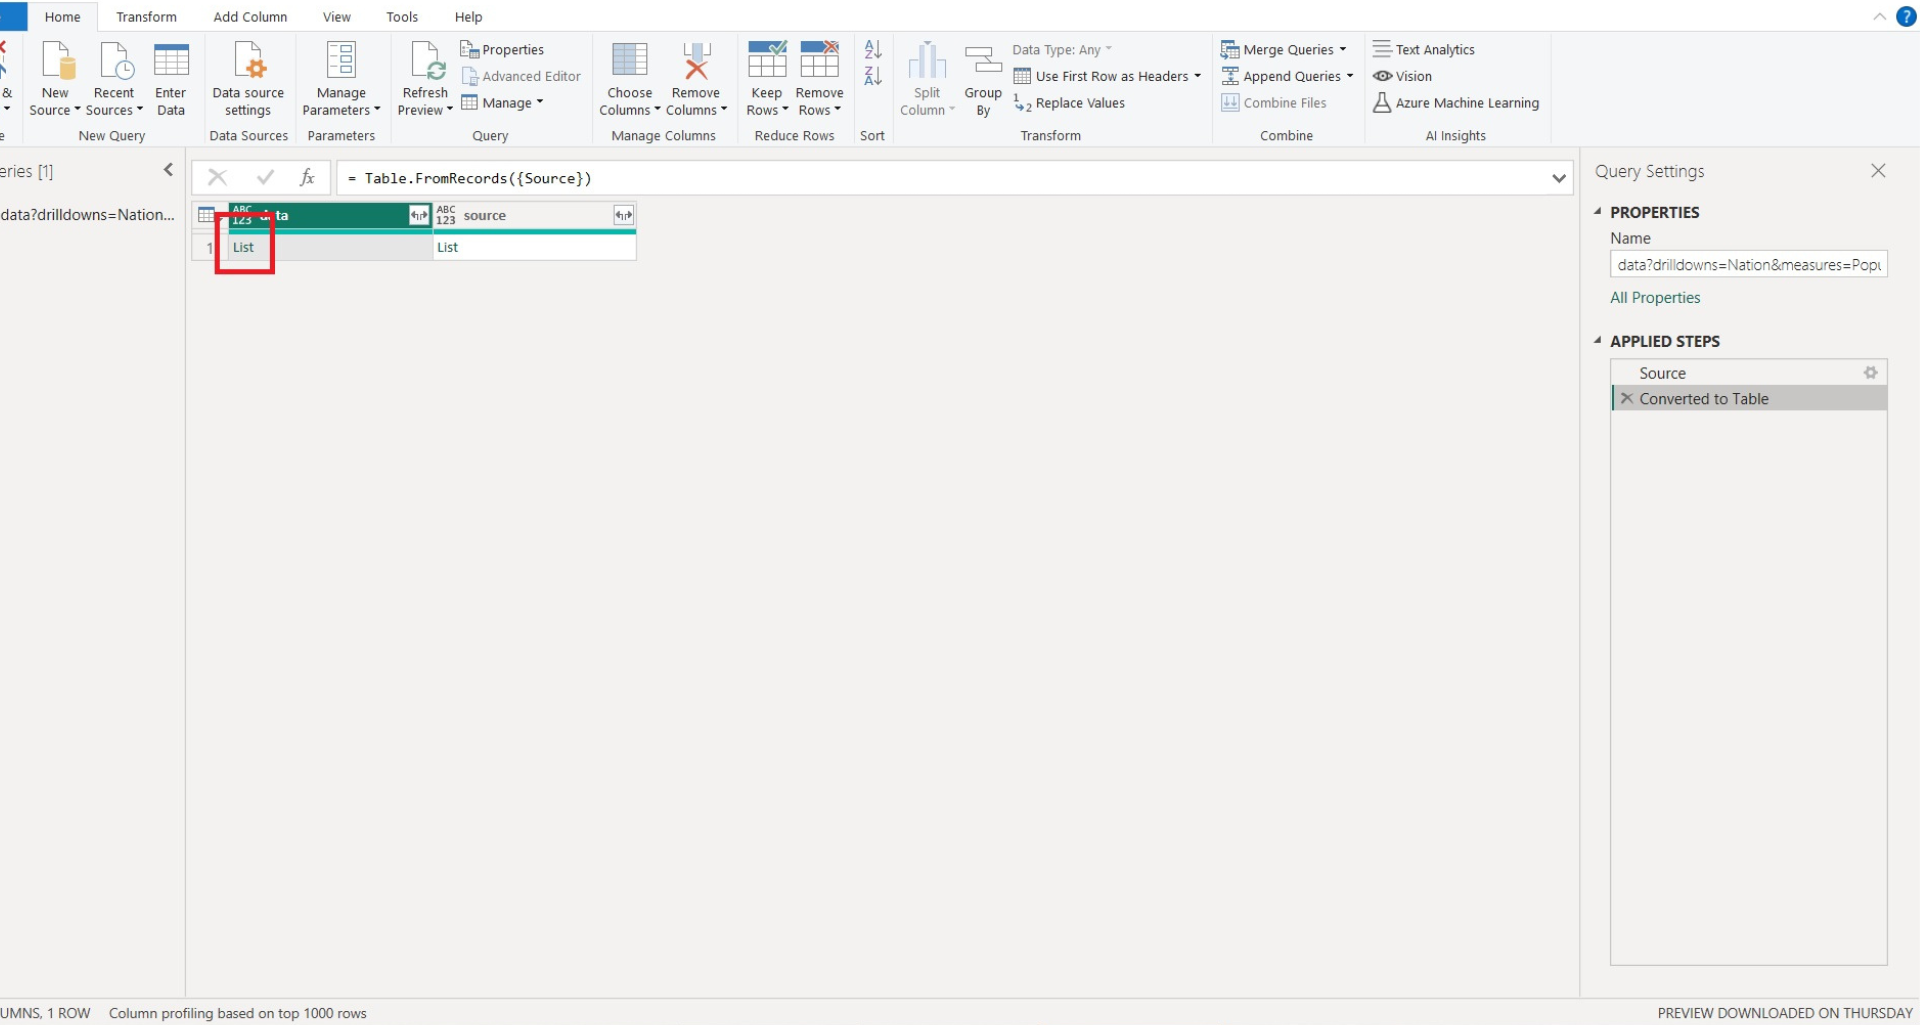
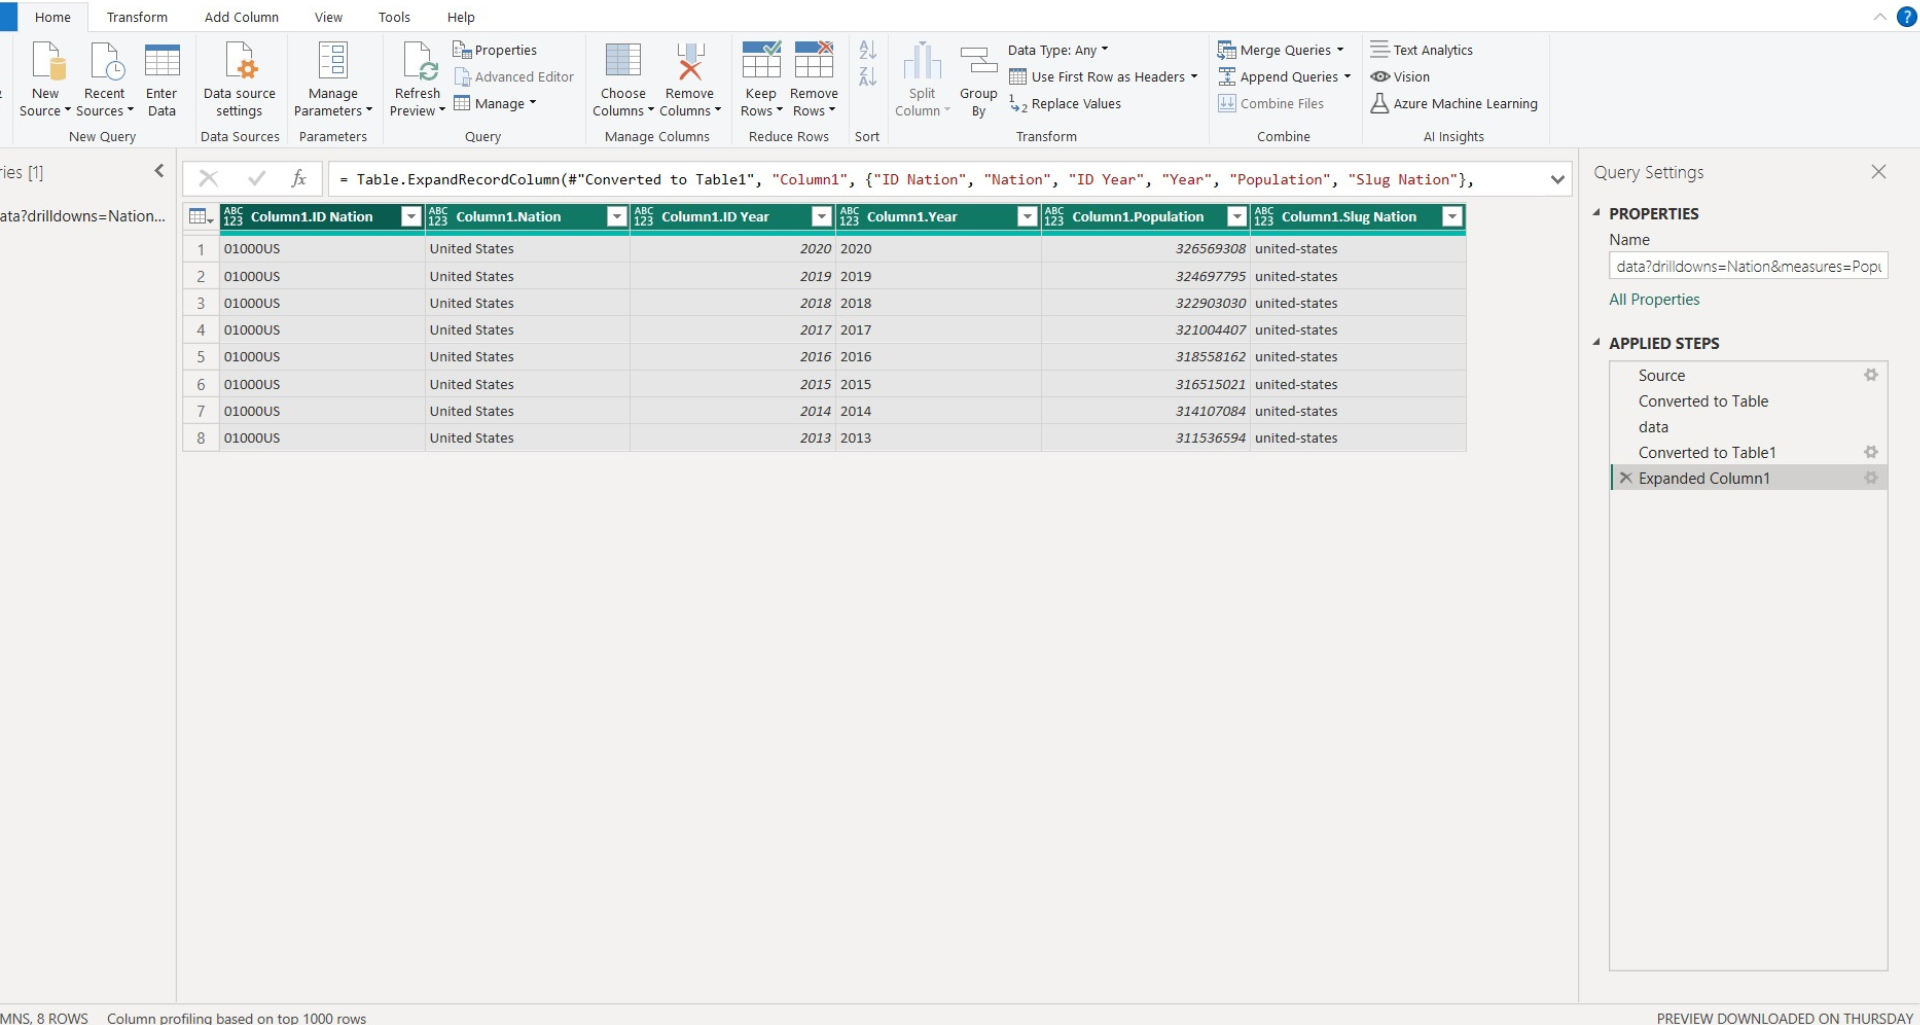
If the header is valid and has access to the data source then it will open the list in Power query.
As the token expires after a specific duration, we must generate a token before every call to get the latest data updated in Power BI.
If your token lifetime is short, you can avoid replacing it all the time by writing a function in Power BI to dynamically generate the token on every ‘GET call’. Let’s look at a demonstration of how this works below.
This is applicable when you want to generate the token dynamically on every call instead of passing it manually. The example below covers an API where you have to log in with a username and password. Upon successful login, the API returns a bearer token.
Open Power Query and click on New source -> Blank Query.

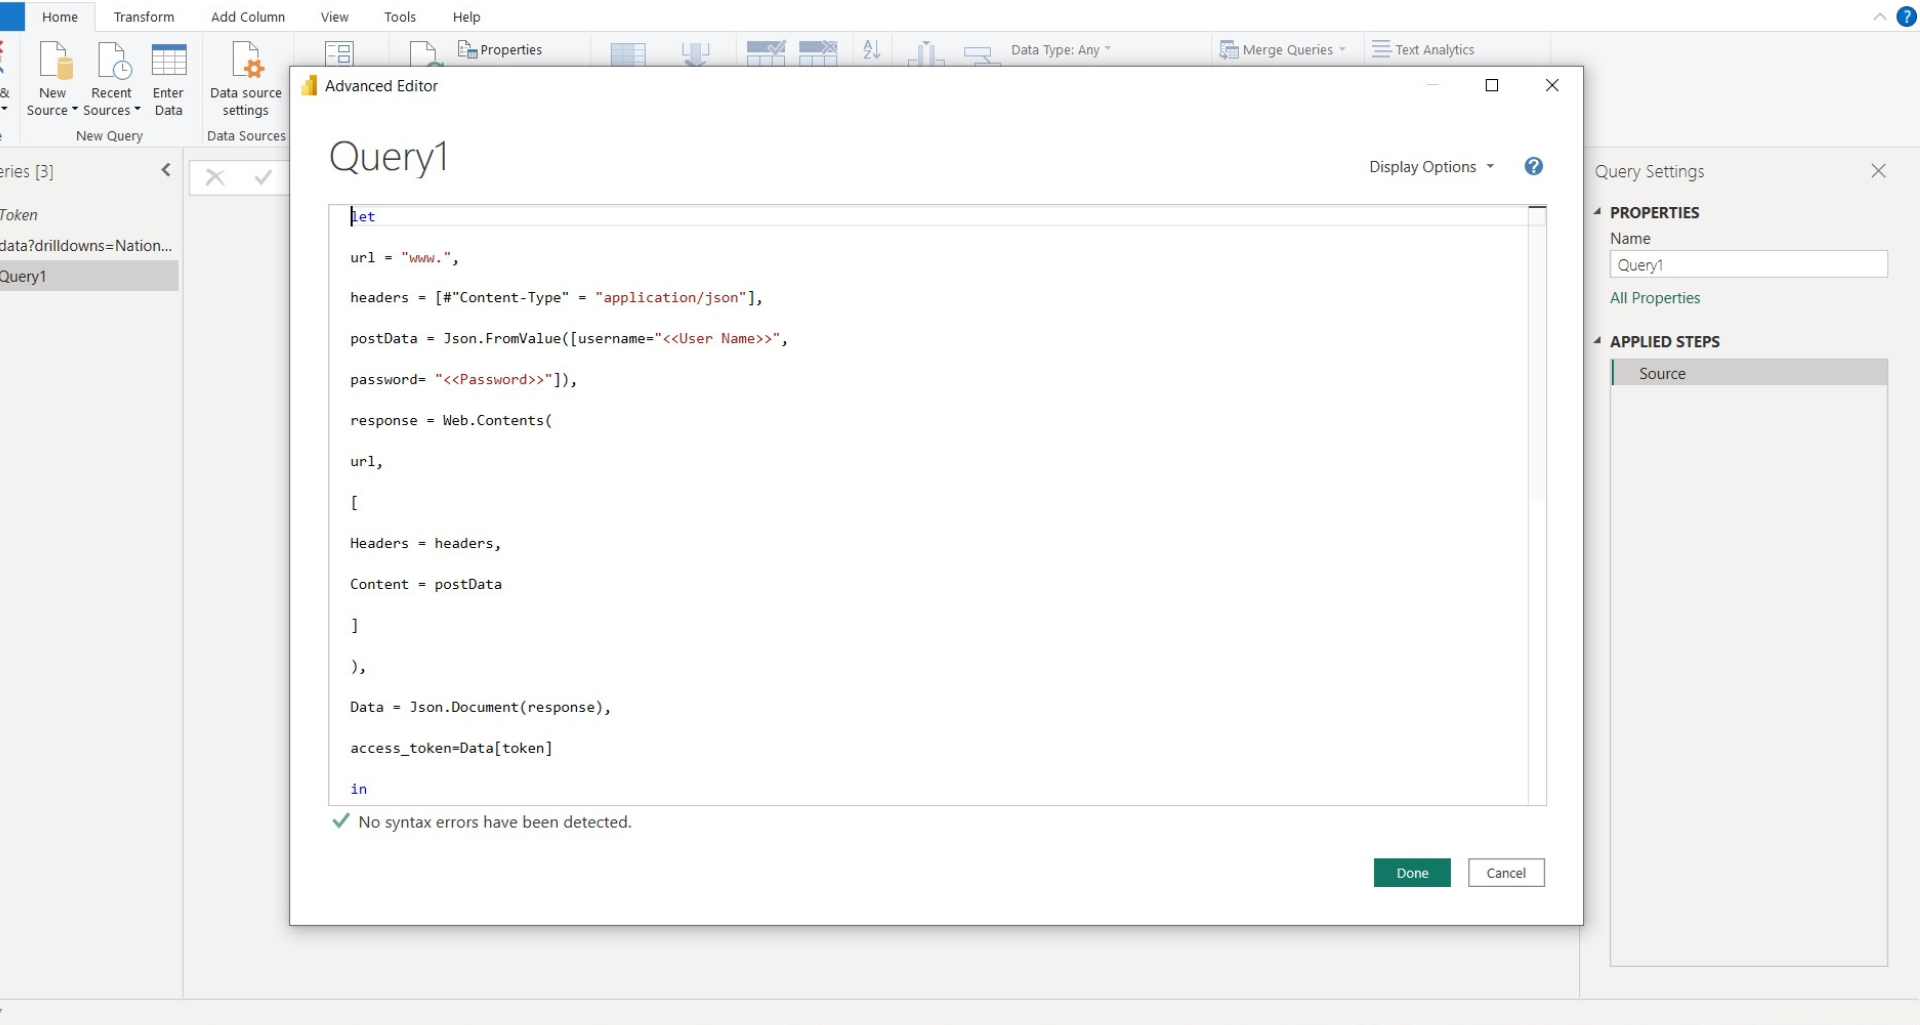
Paste below code in the advanced editor and add the details like URL, Username and password. Click on ok to proceed.
let
url = “URL.”,
headers = [#”Content-Type” = “application/json”],
postData = Json.FromValue([username=”<User Name>”,
password= “<Password>”]),
response = Web.Contents(
url,
[
Headers = headers,
Content = postData
]
),
Data = Json.Document(response),
access_token=Data[token]
in
Access_token
This code will perform the authentication and will generate a token key here.
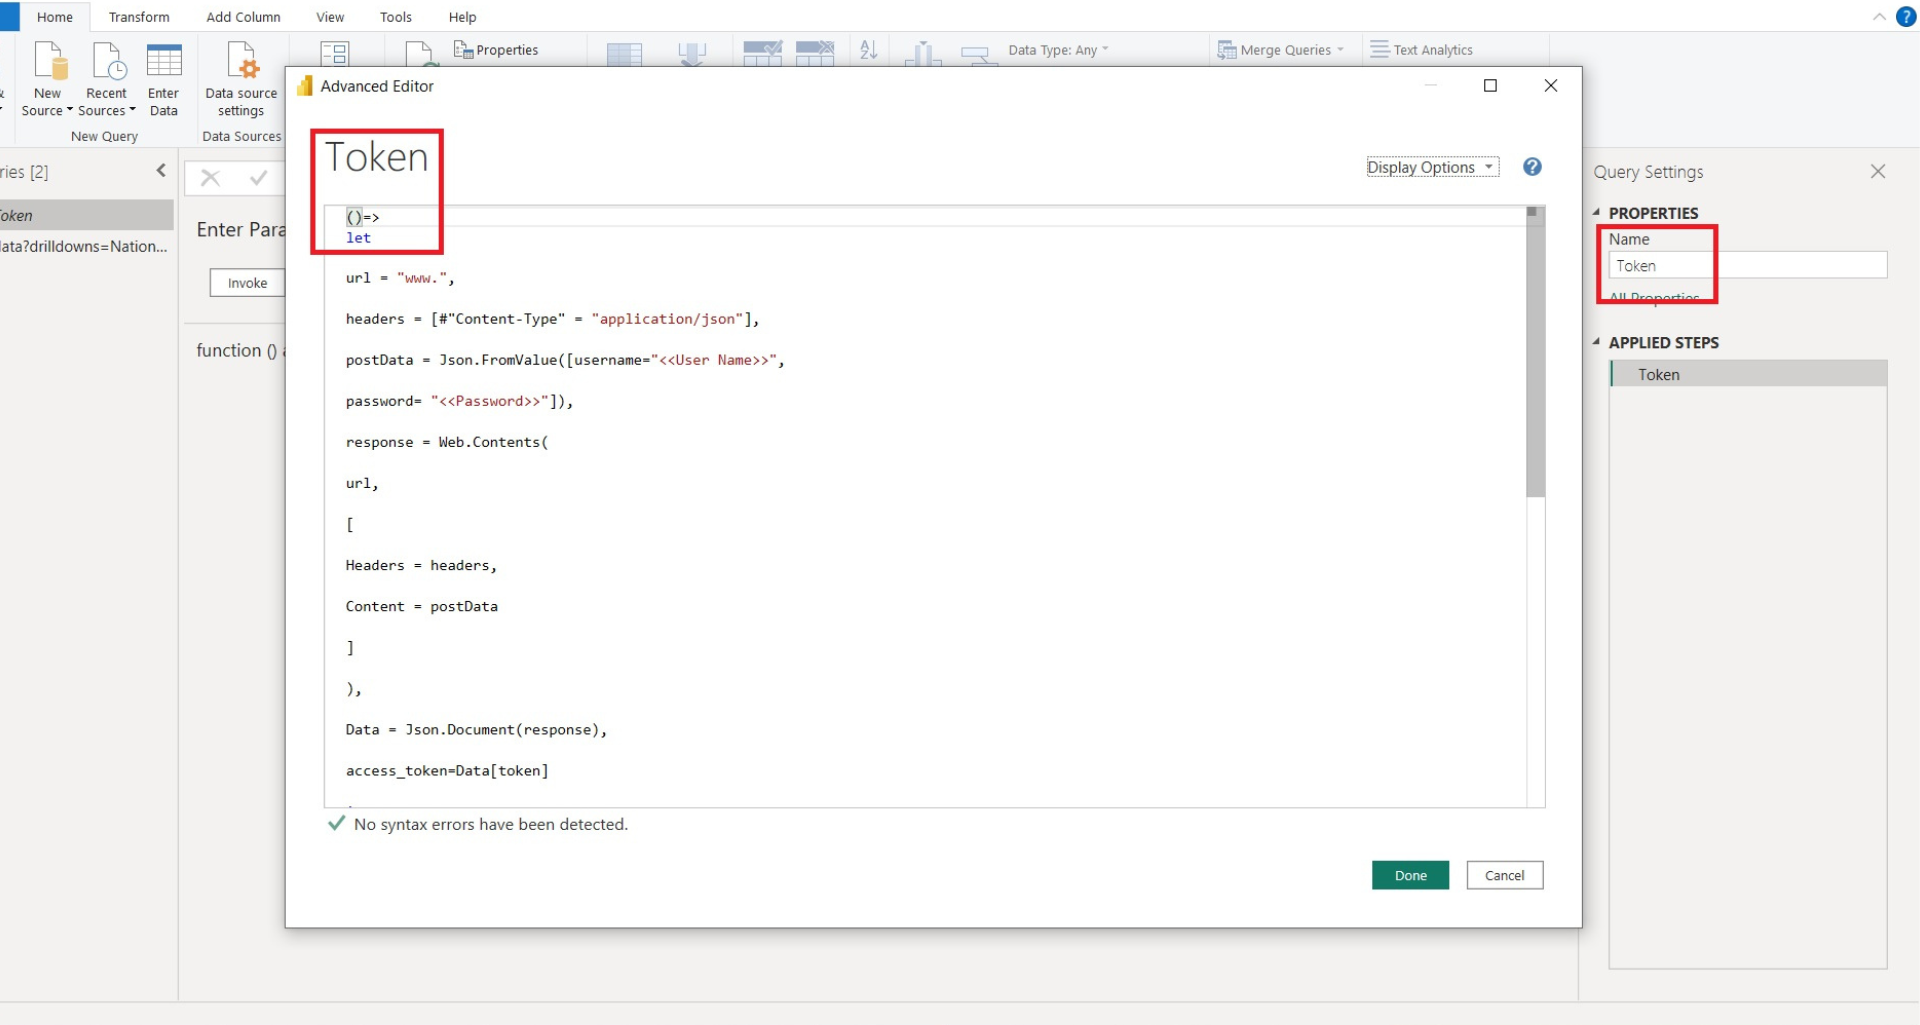
Now the token key is available we can pass it to the authentication, lets’s convert the query into a function.
Add () at the beginning in the advanced editor and click ok. It will convert the query into a function.
Open the dataset and replace the token key with the function name. Make sure we have space between Bearer and the function name.
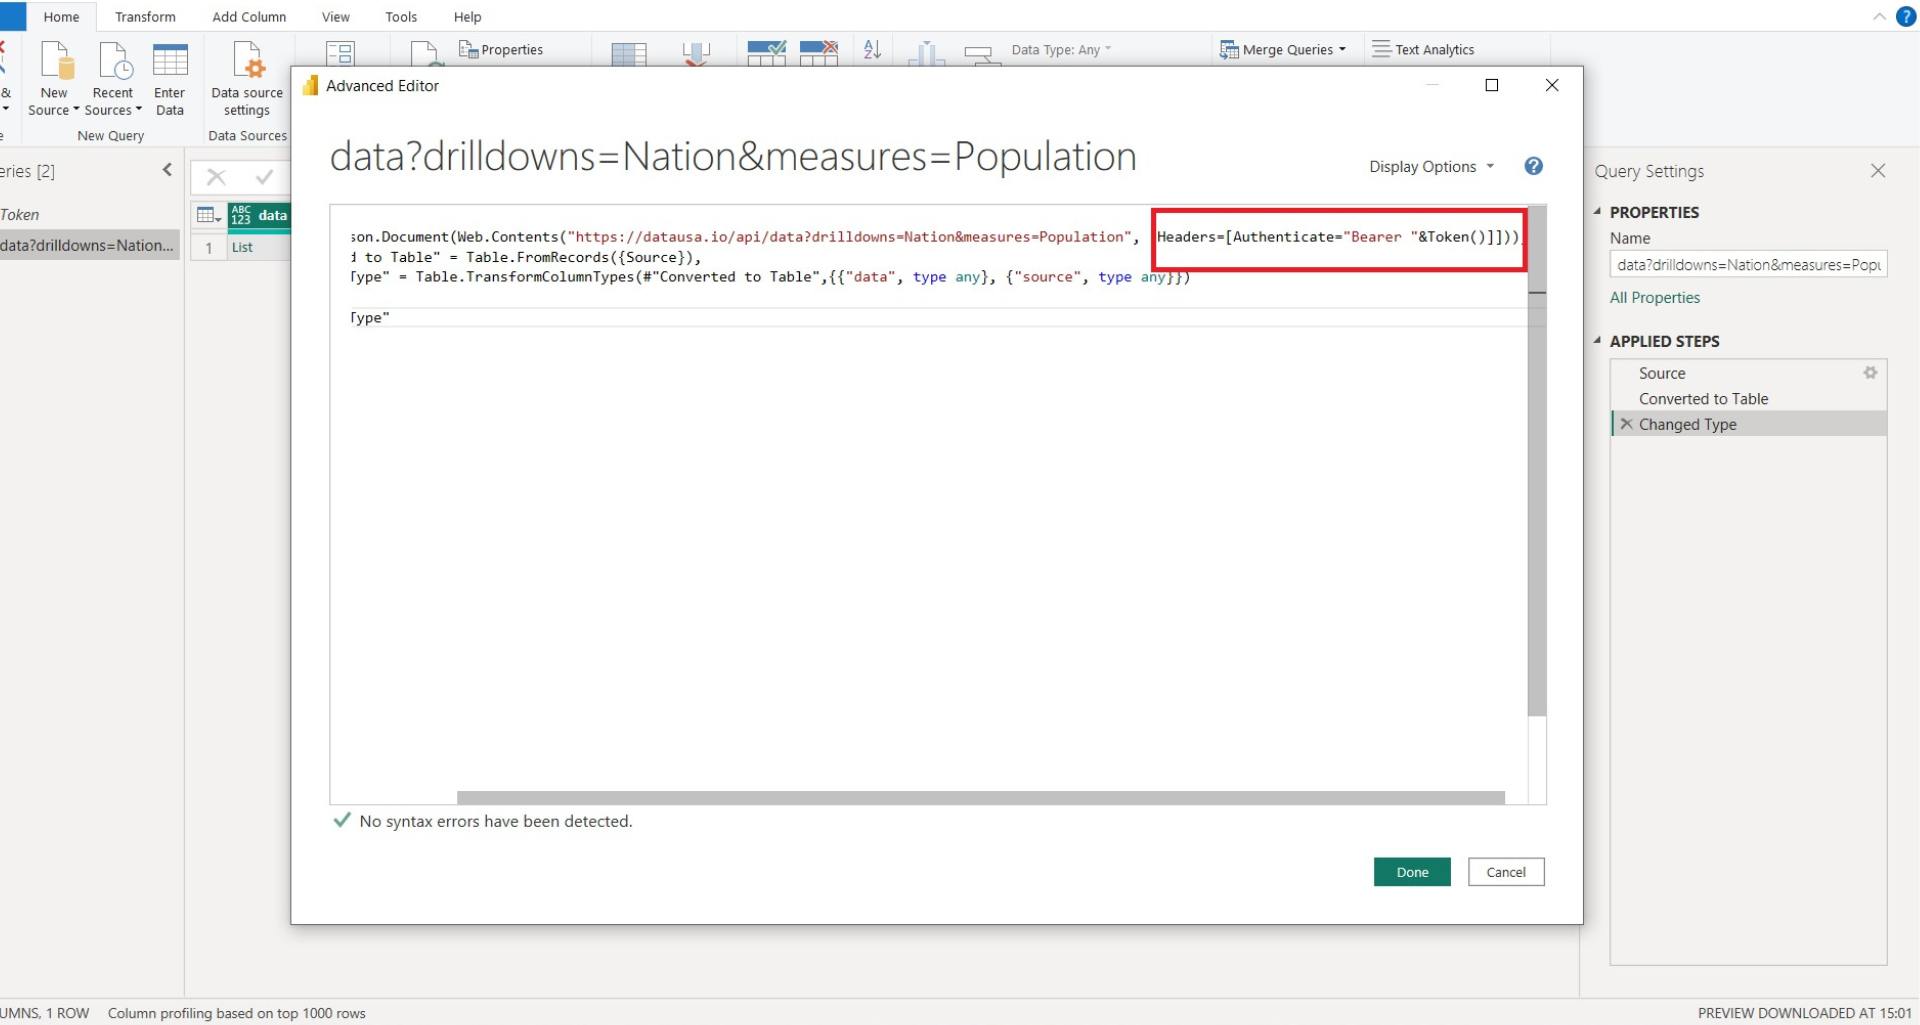
Now every time this data set is loaded, Power BI will generate a new token using the function and will pass it as a key to the authorization.
This article has provided an overview of some beginner concepts for creating a custom connector in Power BI, creating a power bi customer connector folder and using a power bi custom connector oauth2. I hope that this gives you enough information to understand how the process of creating a custom connector in Power BI is structured.
I will release another article in the future to show how to extract data from an API after you are authenticated. Stay subscribed to our blog in order to not miss it!
If you need specialist help to create a custom connector for you, you can contact us to discuss your project. It usually takes us 1-2 weeks to create a fully functional Power BI custom connector. The prices per custom connector with us are usually in the range of $1,000-2,500 per API.
![]()
![]()
![]()