
Eugene Lebedev is a Power BI consultant by background. Before founding Vidi Corp in 2021 he created Power BI reporting for Autodesk. His Power Bi reports were used by VPs of Finance and C-suite of Autodesk. As part of Vidi Corp, Eugene created dashboards for Google, Teleperformance, Delta Airlines and 200+ clients worldwide.
Data security is a critical aspect of using Power BI. You need to ensure that only authorized users can access your data and that sensitive information is protected. Currently Power BI supports row-level security which allows you to control access to data at the row level. This means you can restrict access to sensitive data based on a user’s role or permission level.
There are instances where businesses would like to hide or show a page based on a user’s role or permission level. This isn’t an out-of-the-box feature in Power BI but there is a workaround to achieve it using DAX and Row Level Security. Let’s look into step by step implementation of page-level security in Power BI:


In order to assign the permissions to the user, we need a table to assign access. A permission table can be added from your data model or created using DAX. We will create a permission table using DAX as follows:
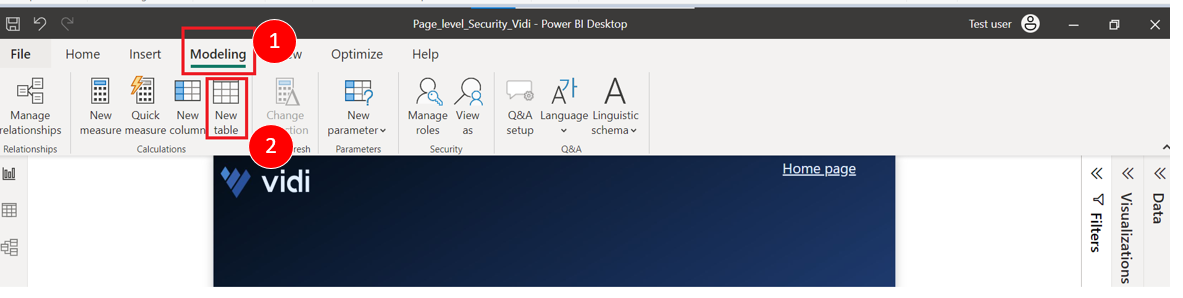
1. Go to the modeling tab and click on “new table”.
2. Add below DAX function to add a table for permissions:
Permission = DATATABLE(“user”, STRING, “PagePermission”, STRING,
{
{“testuser1@Radhey2021.onmicrosoft.com”,”ProductView”},
{“testuser@Radhey2021.onmicrosoft.com”,”CampaignView”},
{“testuser3@Radheyomain.onmicrosoft.com”,”Overview”},
{“testuser2@Radhey2021.onmicrosoft.com”,”All”}
}
)
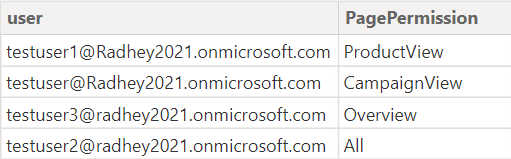
This will create a table in the below format that can be used as a permission table :
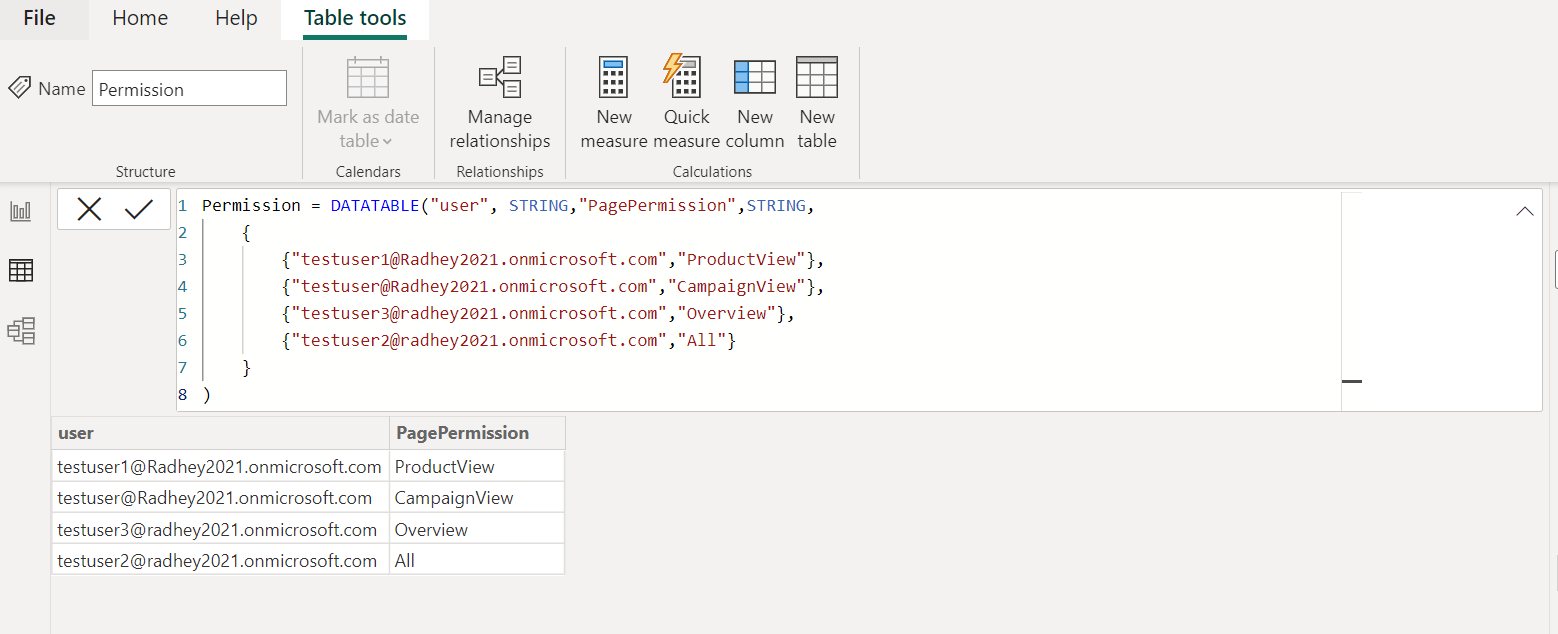
User denotes the email id of the user and page permission denotes the page/tab name in the report to be accessible by the corresponding user.
3. Now our permission table is available, we will create a role to implement row-level security. In order to create a role, go to Modelling -> Manage Roles -> Provide the role name.
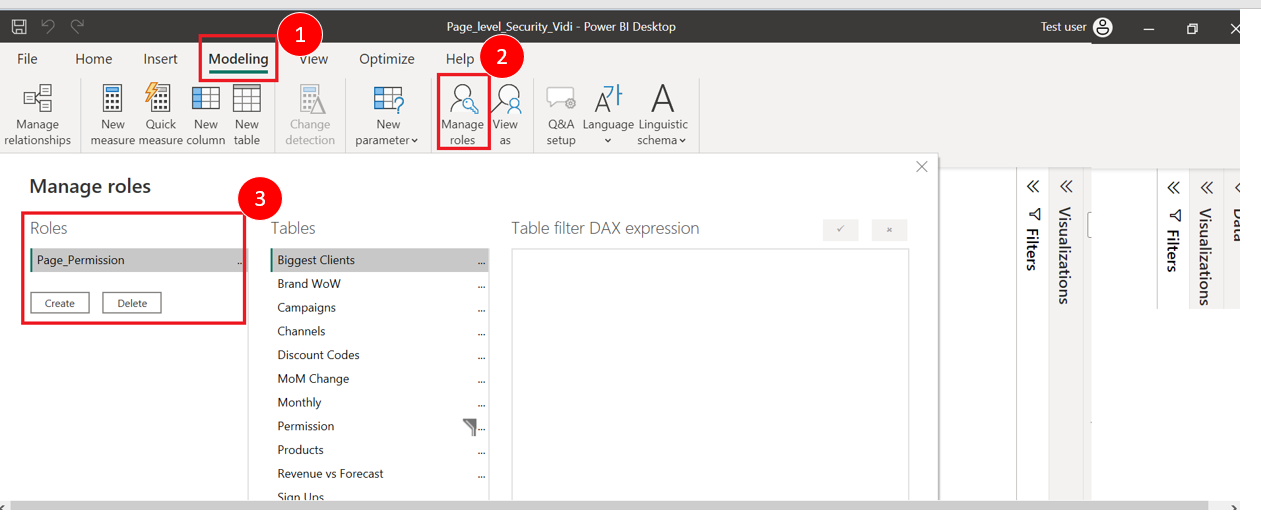
4. Our role name would be Page_Permisions here now we will add a condition. Select the table -> Click on three dots -> Add a filter and write the below expression:
[user] = USERPRINCIPALNAME()
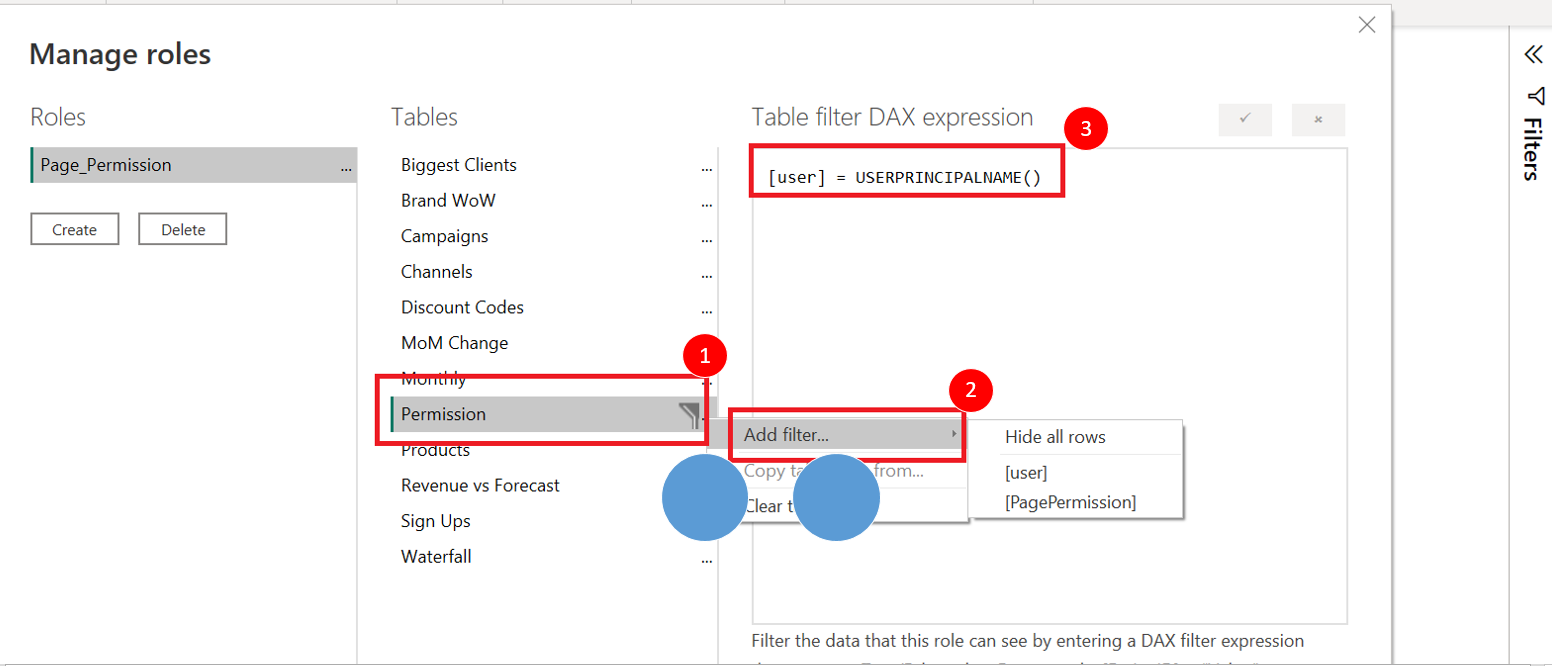
Note: USERPRINCIPALNAME() functions retrieve the email id /UPN of logged-in User in Power BI.
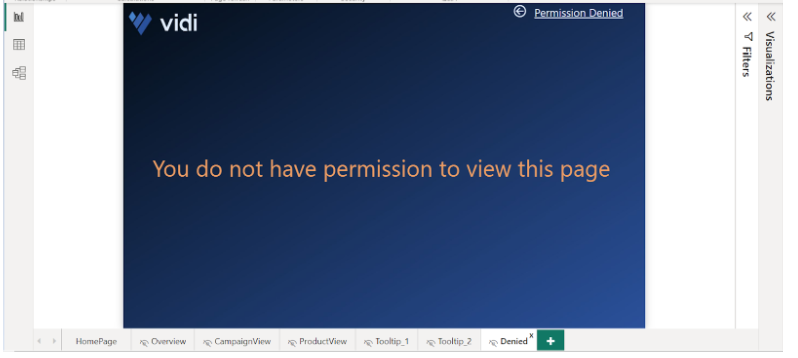
5. Once a role is created we need to create a measure for each page. Before that let’s create another page called “Denied”. When a user doesn’t have access to a page, Power BI will navigate them to the Denied page. Click on add a page and design the page as follows by adding a text that says “You do not have permission to view this page”.
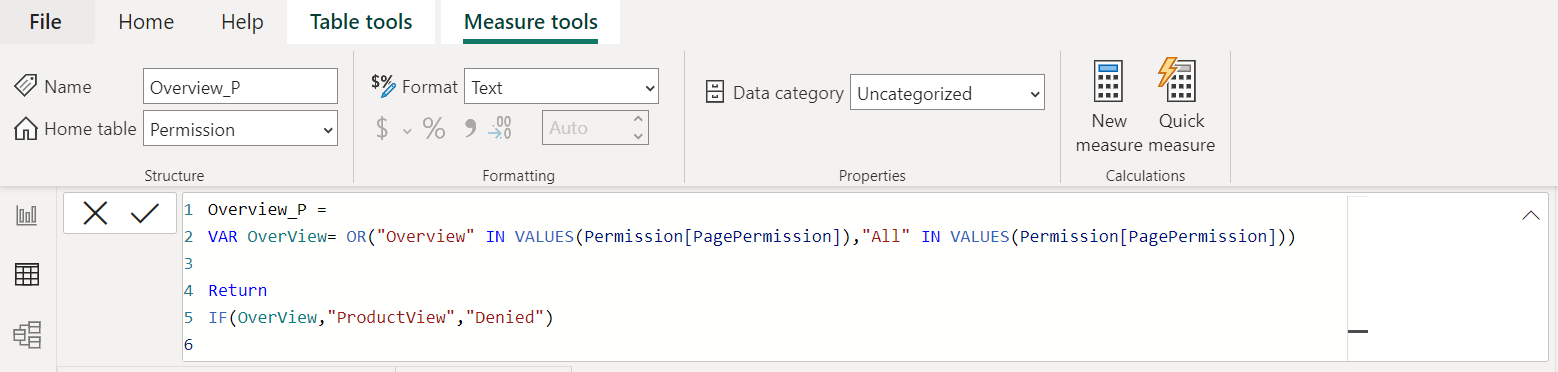
6. Let’s create a measure for the overview page. Click on the new measure and add the below DAX query to it:
Overview_P =VAR OverView= OR(“Overview” IN VALUES(Permission[PagePermission]),”All” IN VALUES(Permission[PagePermission]))
Return IF(OverView,”ProductView”,”Denied”)
The measure will check the page permission of logged-in users and will return the relevant pages.
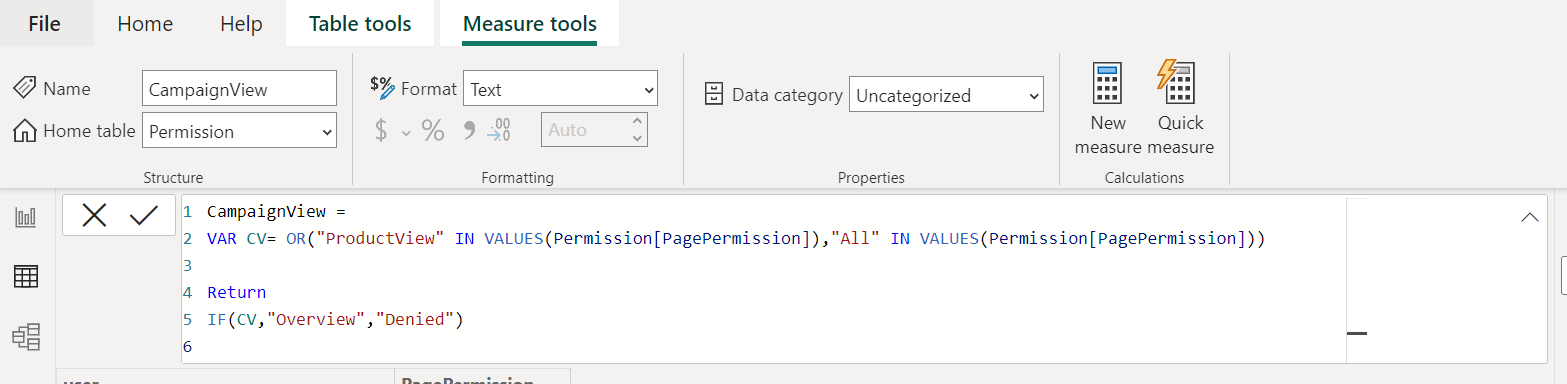
Similarly, we will create two measures for CampaignView and ProductView Page:
CampaignView =
VAR CV= OR(“ProductView” IN VALUES(Permission[PagePermission]),”All” IN VALUES(Permission[PagePermission]))
Return
IF(CV,”Overview”,”Denied”)
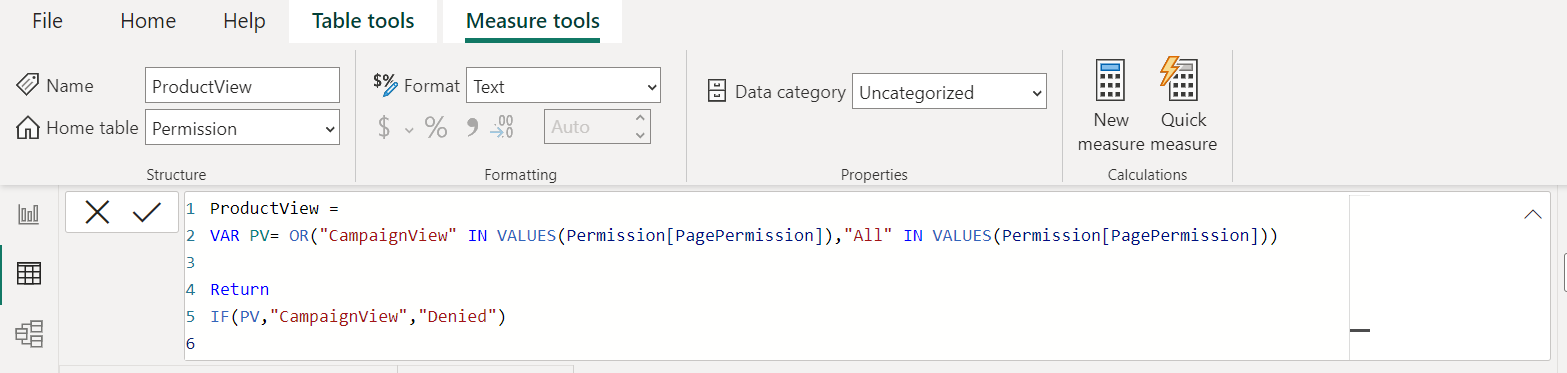
ProductView =
VAR PV= OR(“CampaignView” IN VALUES(Permission[PagePermission]),”All” IN VALUES(Permission[PagePermission]))
Return
IF(PV,”CampaignView”,”Denied”)
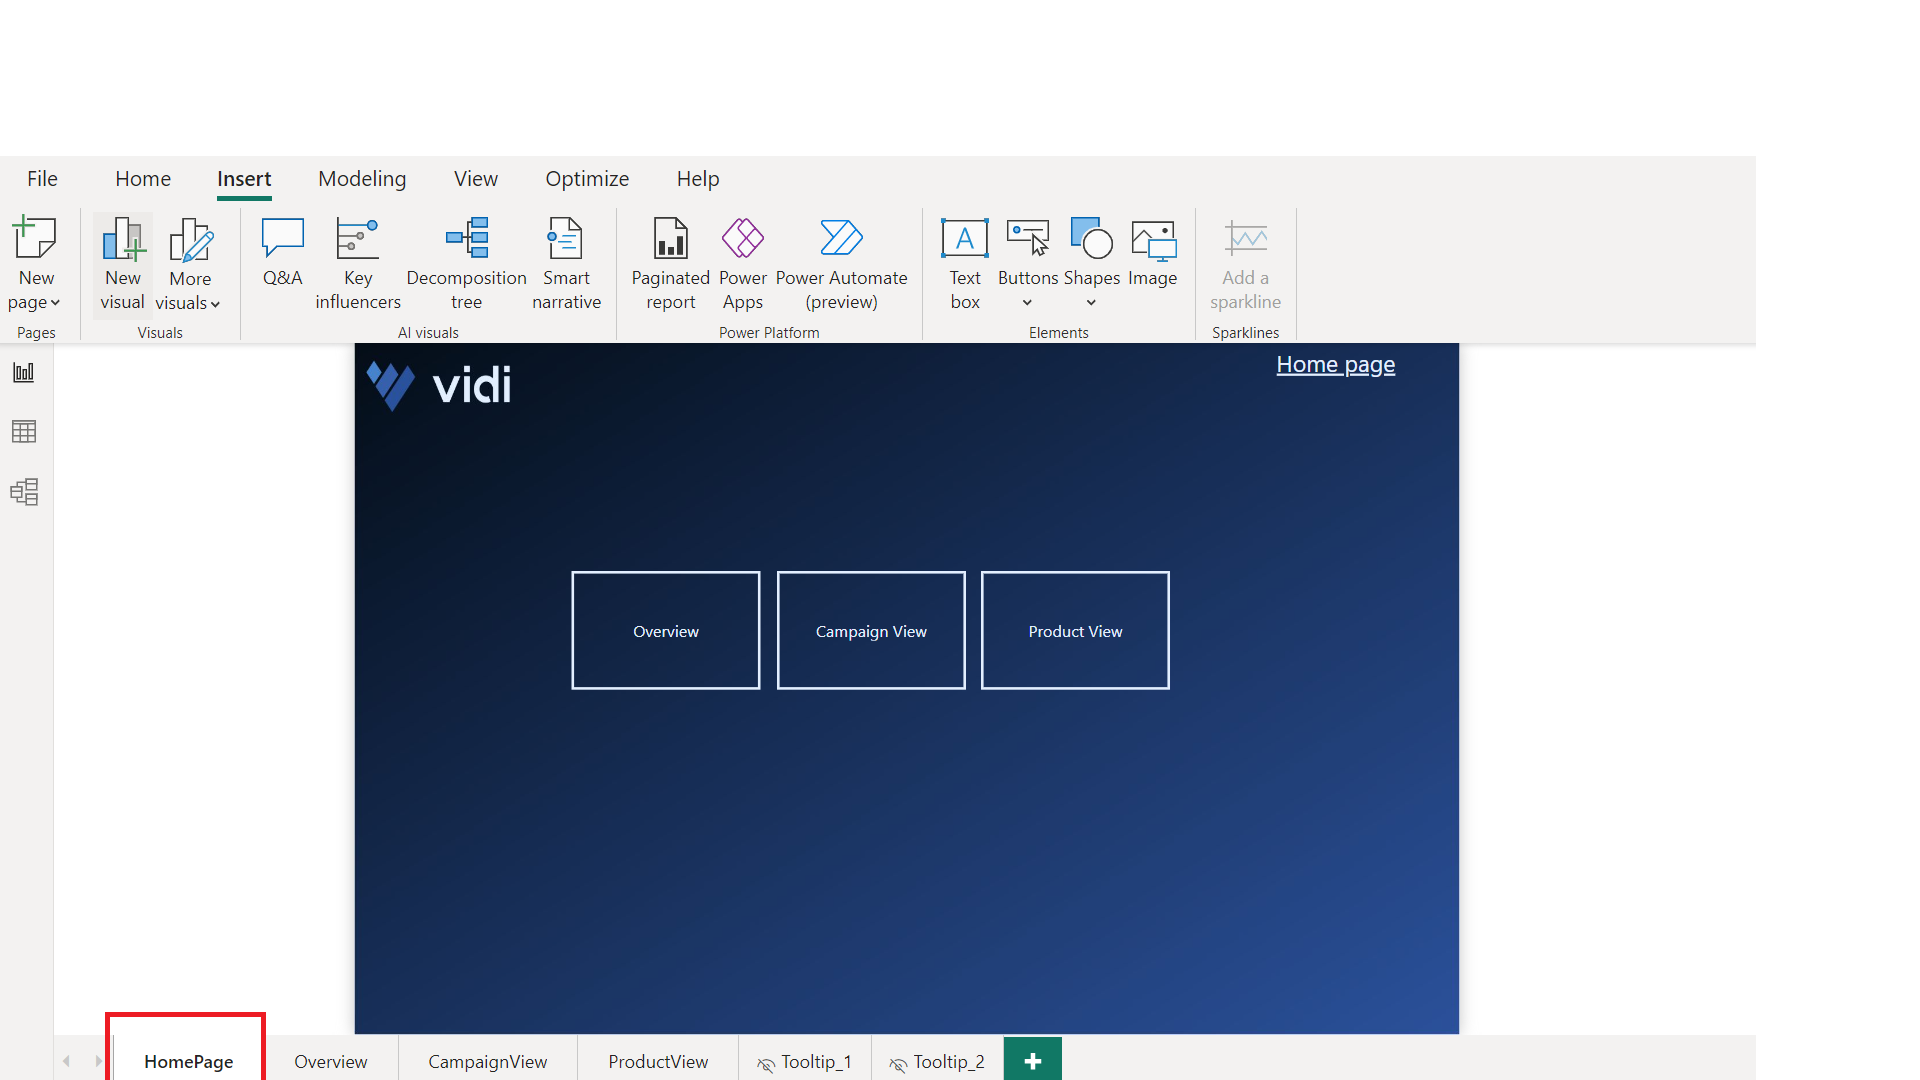
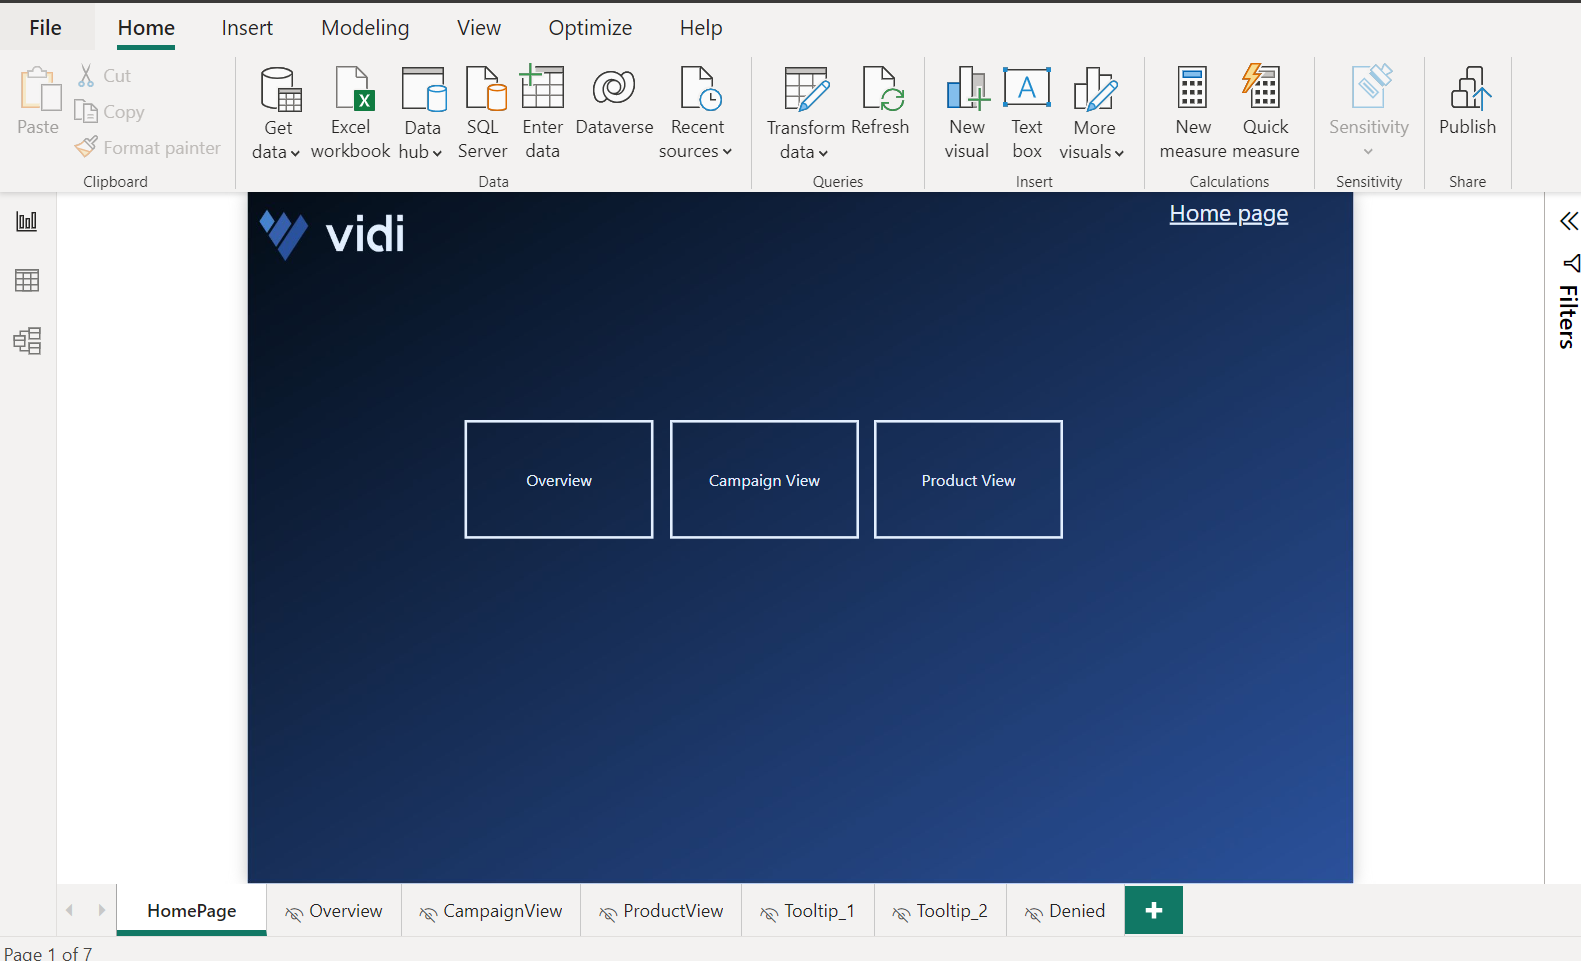
7. Now let’s create a homepage for the report and add a button for each page for navigation. We will not create a button for the denied page here.
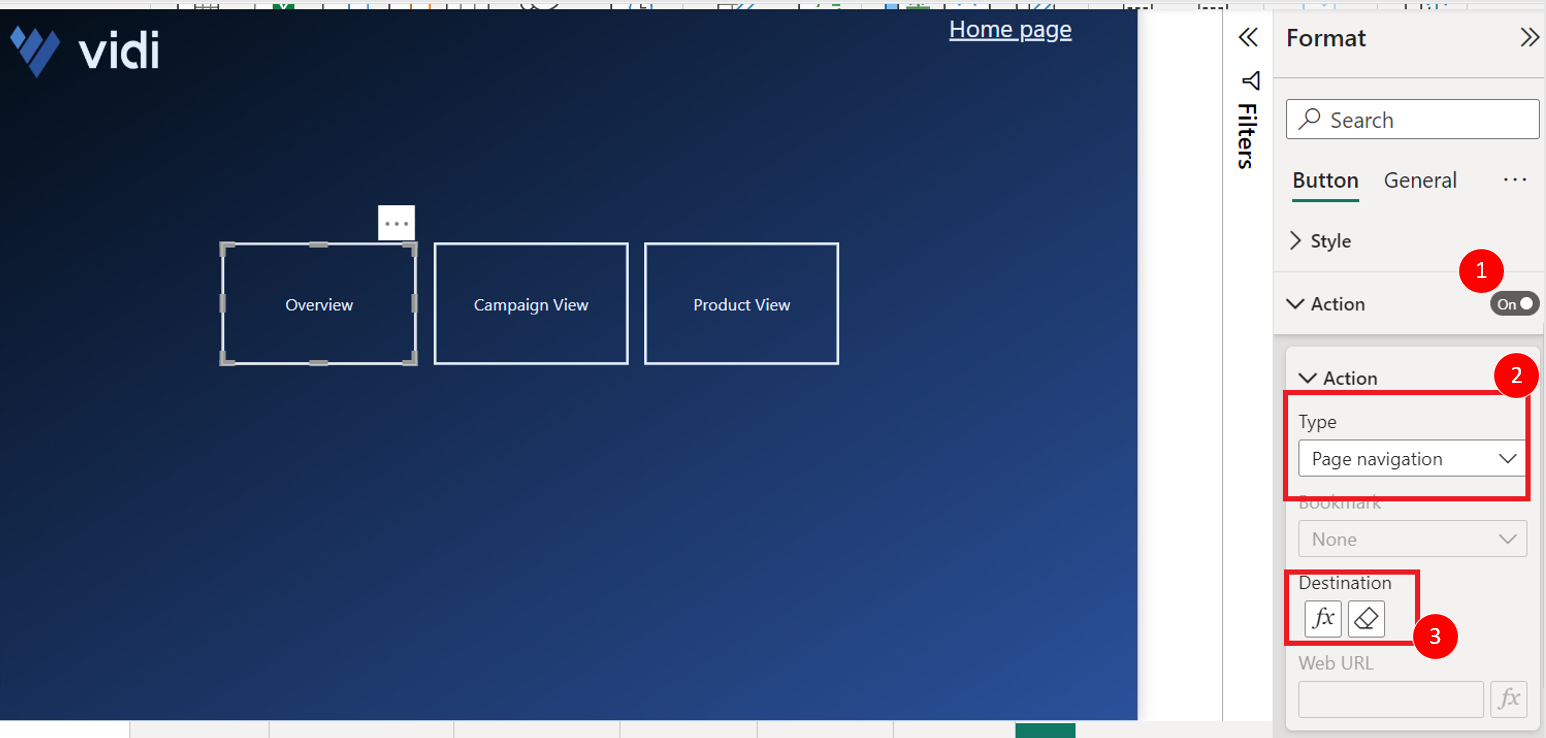
We need to add an action for all these buttons so that when the user clicks, it should take them to the correct page. Select the button -> Go to format panel -> Action.
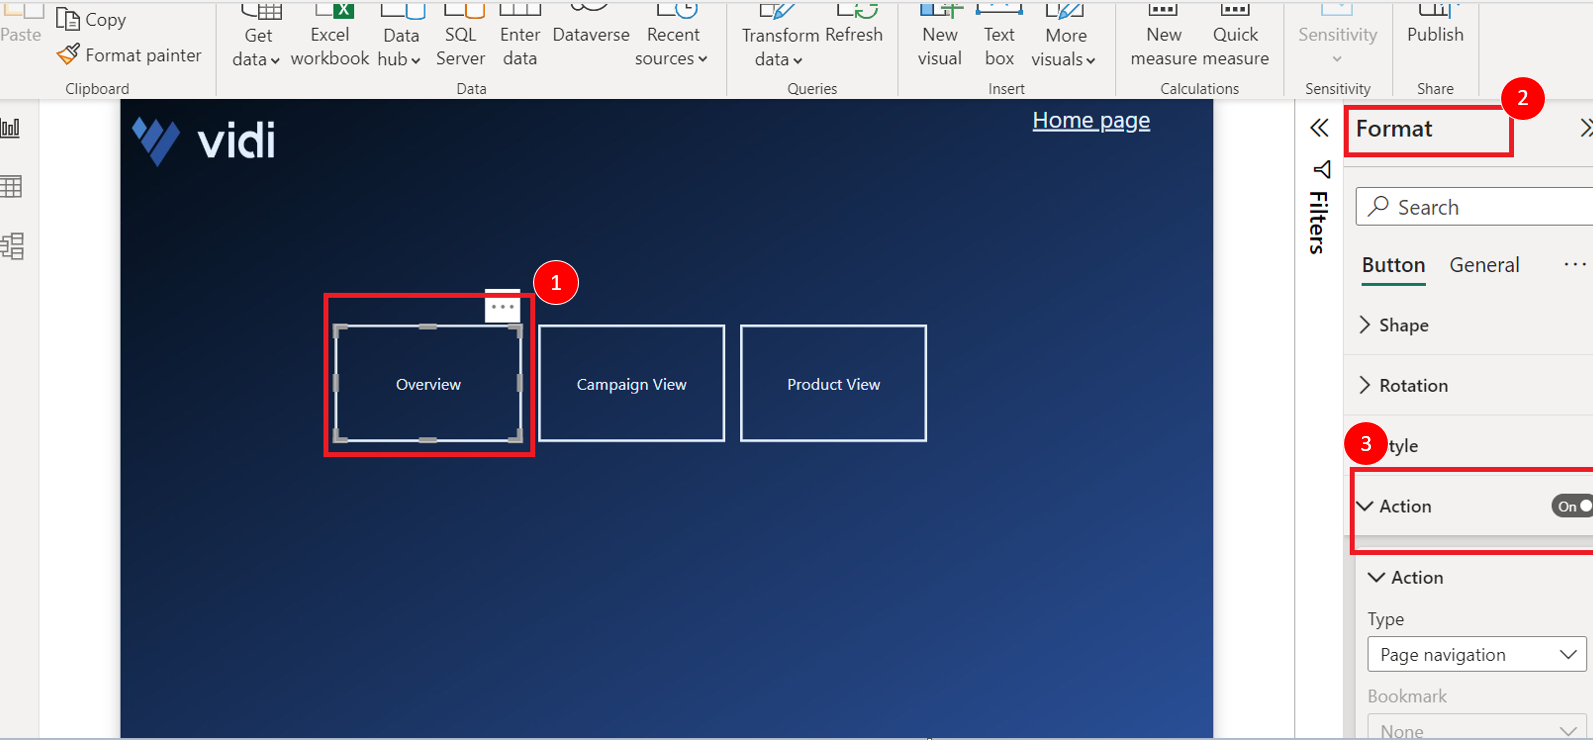
In the action tab, go to type and select page navigation then click on fx in the destination. Here we will add the destination using conditional formatting.
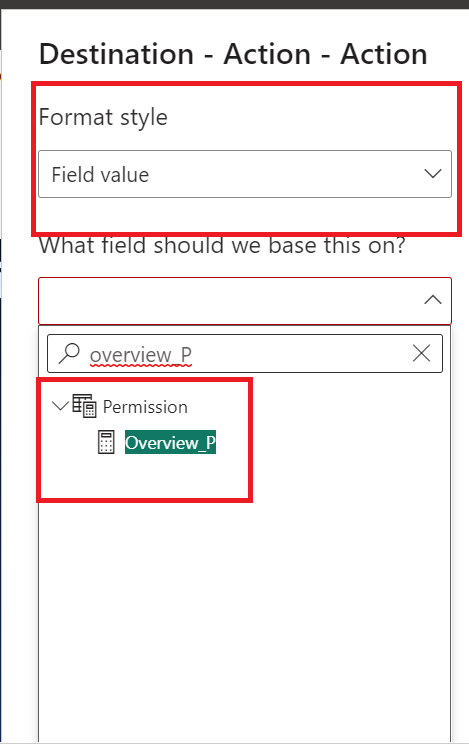
In the conditional formatting pane, select format style as the field value and add the corresponding measure to it. Remember we have to create a separate measure for each page. Currently, we are in the Overview tab so we will add OverView_P measure here:
Likewise, we will add other two measures to their page action tab using conditional formatting.
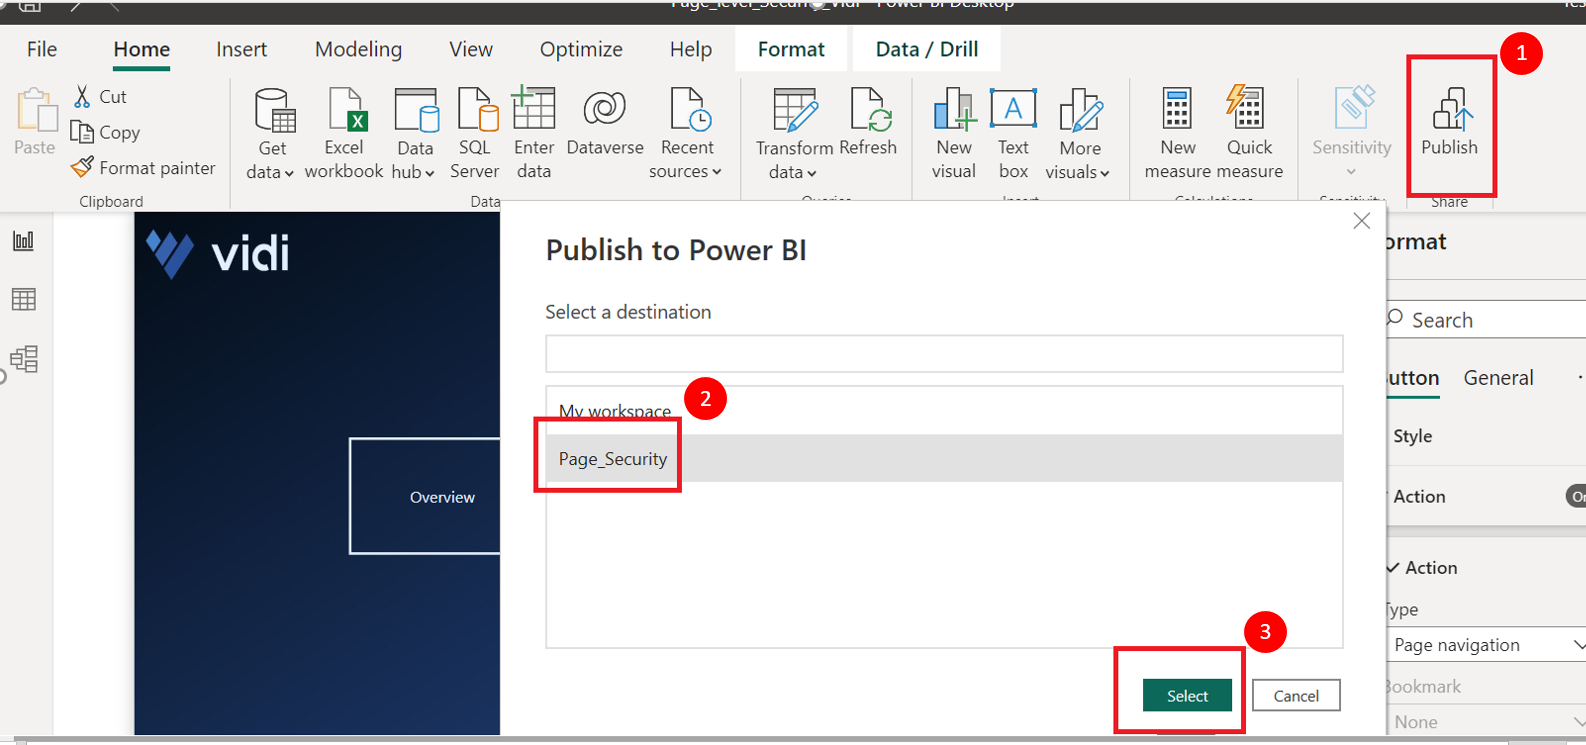
8. Once everything is completed, let’s publish the report to the Power BI service. Click on publish and select the workspace name.
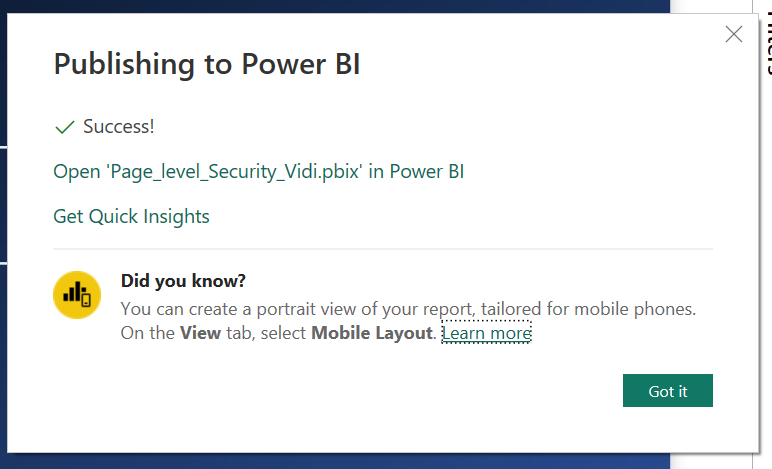
9. Once the report is published, it will show the below message:
10. Go to https://app.powerbi.com/ in your browser and navigate to the workspace where the report is published.
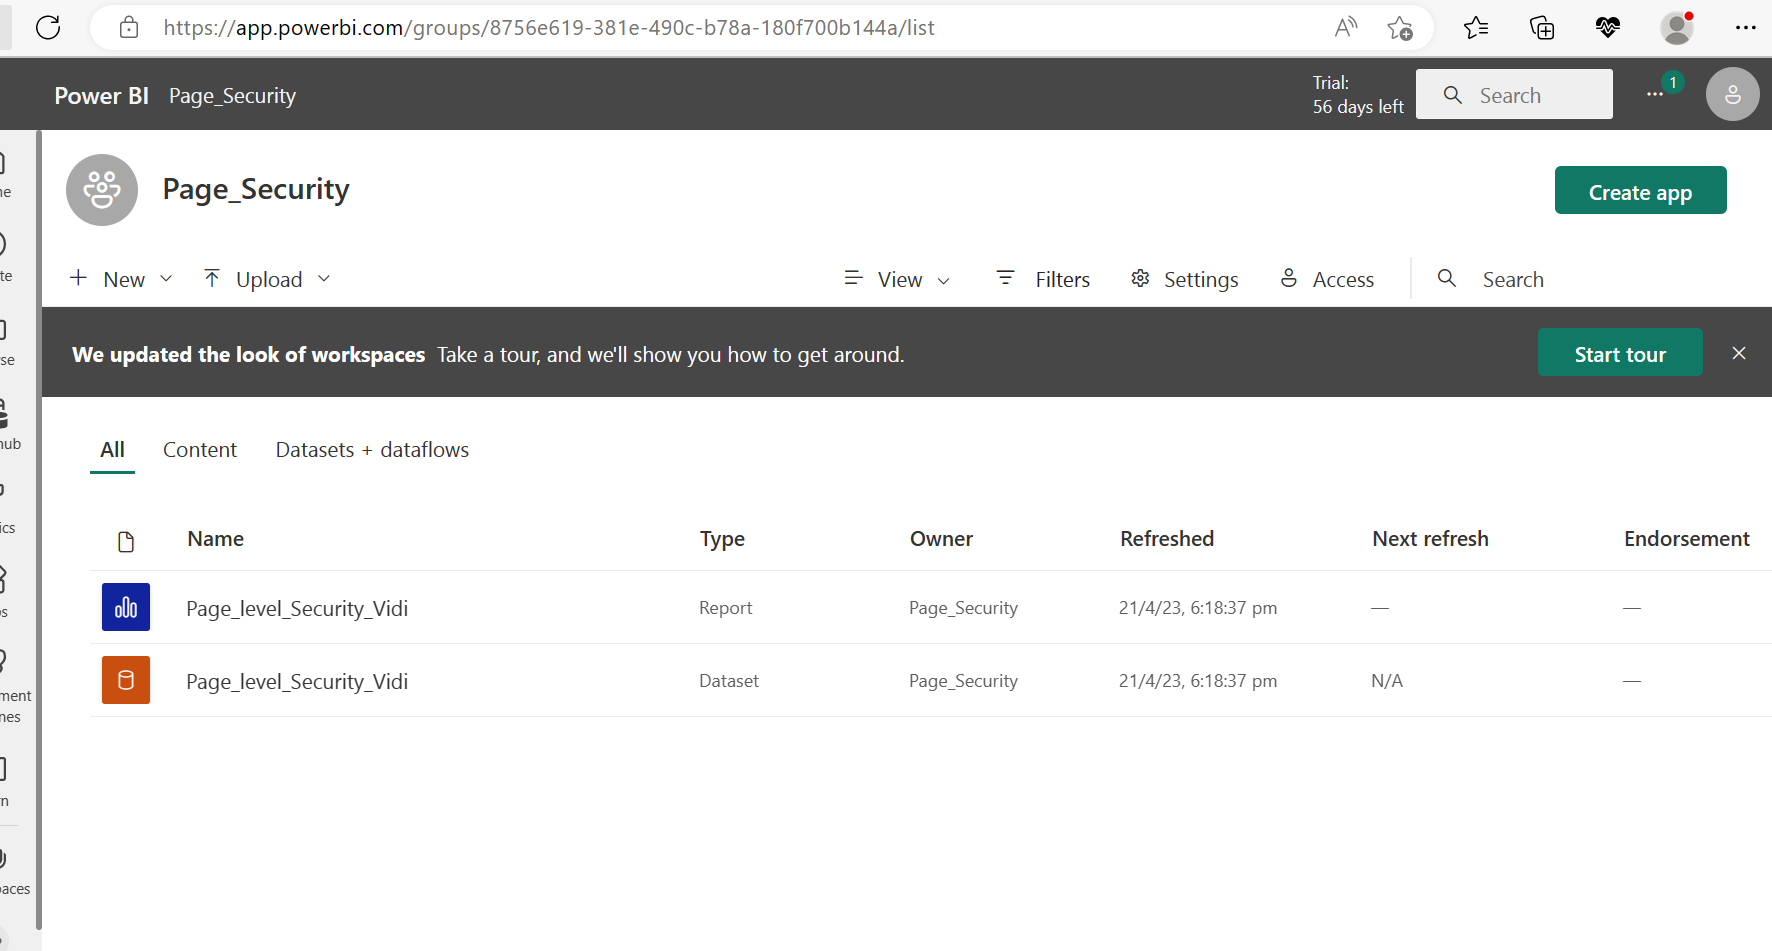
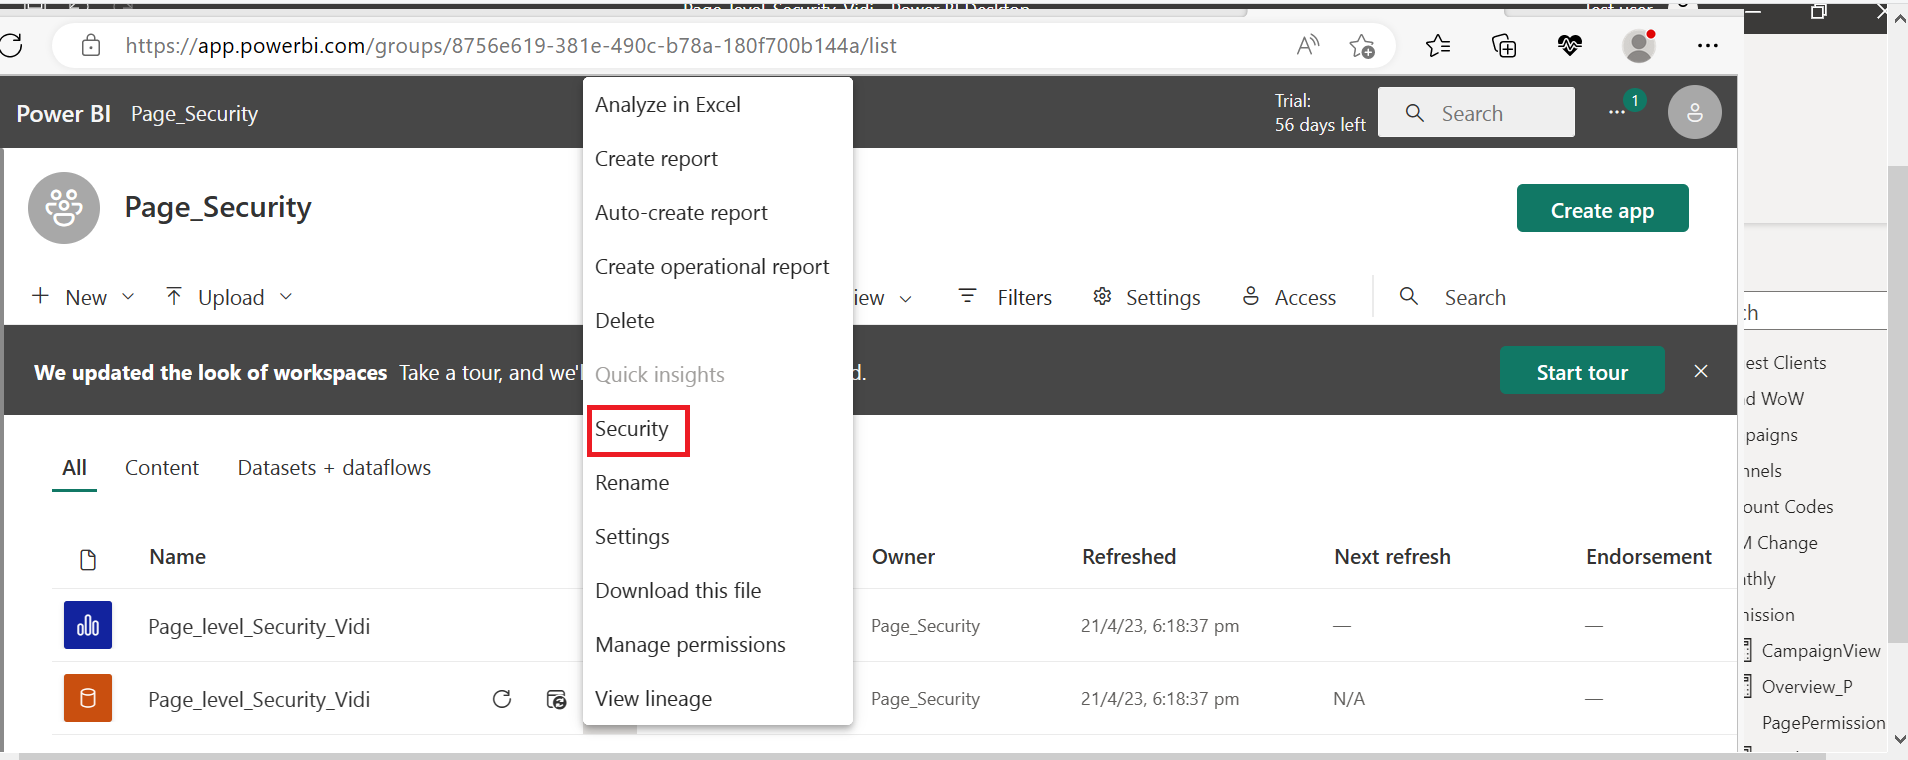
11. Click on the three dots of the data set -> More options -> Security
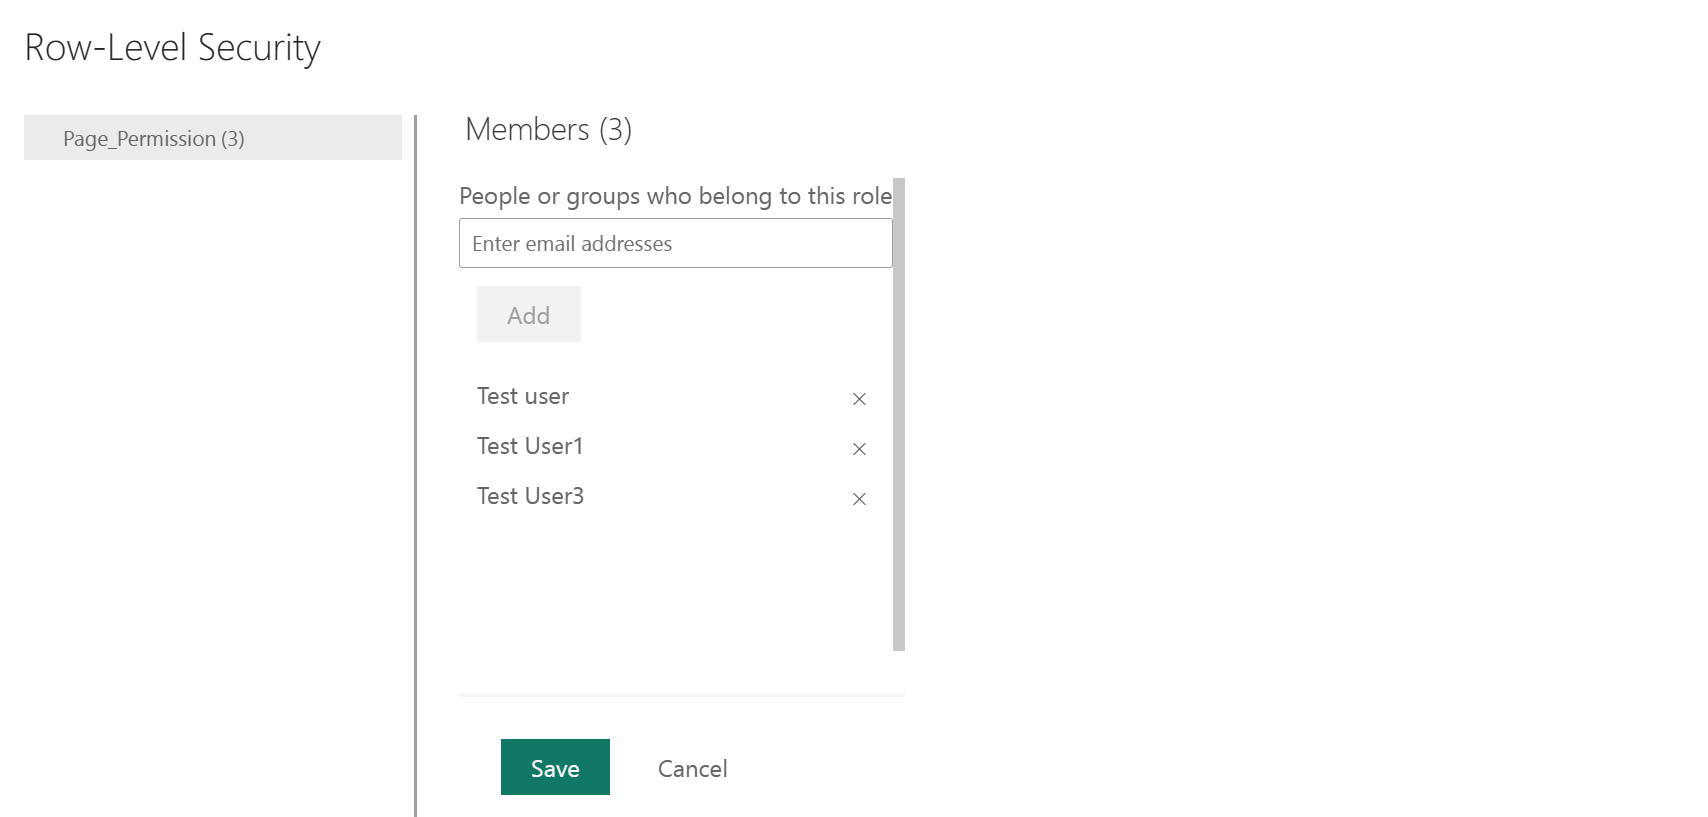
12. It will open the security page and the role created by us on the desktop would be visible here. Add the users to the role as per the data table created on the desktop so that they would have access to the dataset:
We will add all the above users to the role in the Power BI Service.
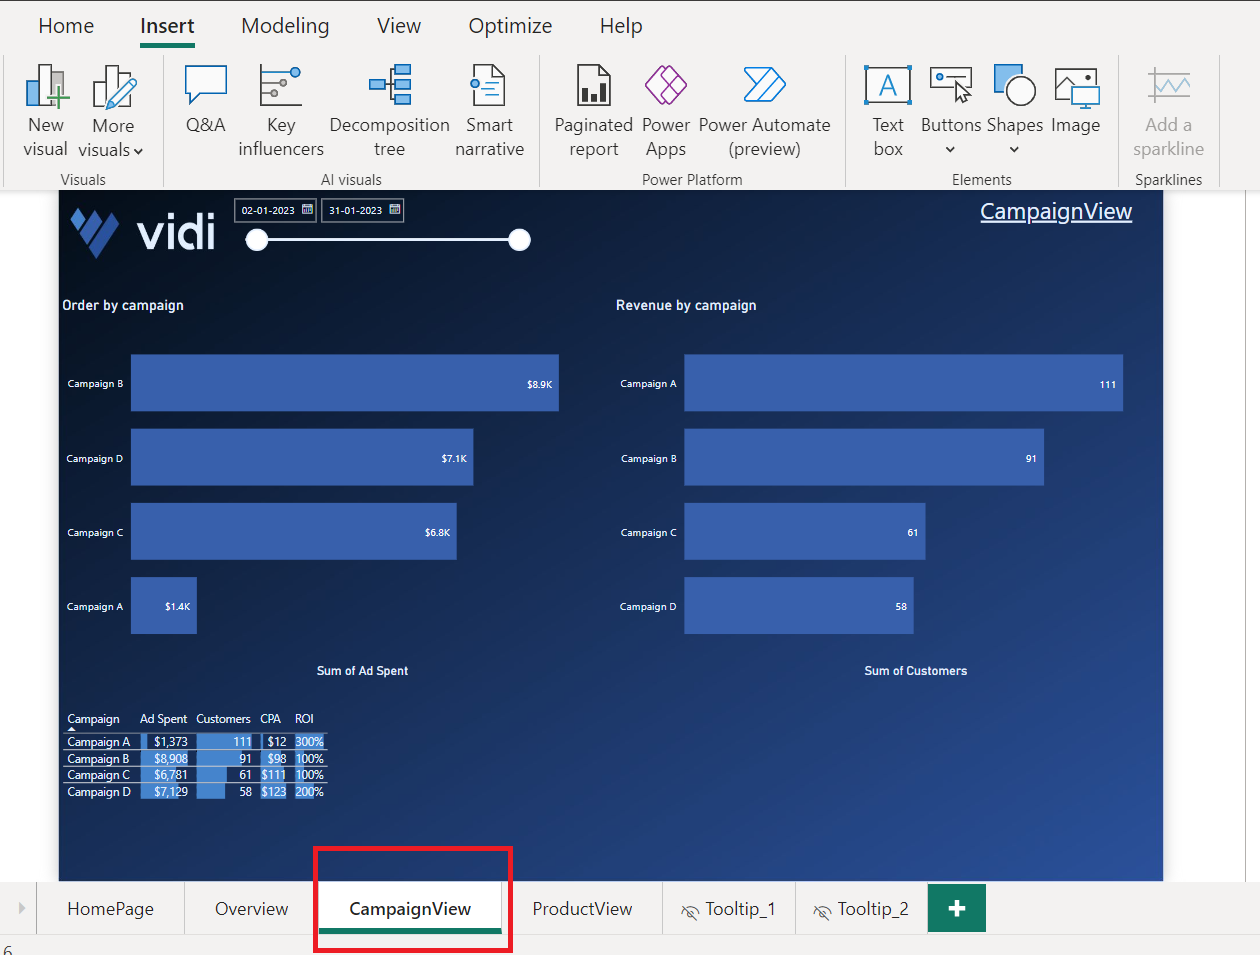
13. Everything is set up now, let’s test it. As per the page permission table, user testuser3 should have access to the ‘overview’ page only. We will log in to Power BI using testUser3 credentials and try to access the report:
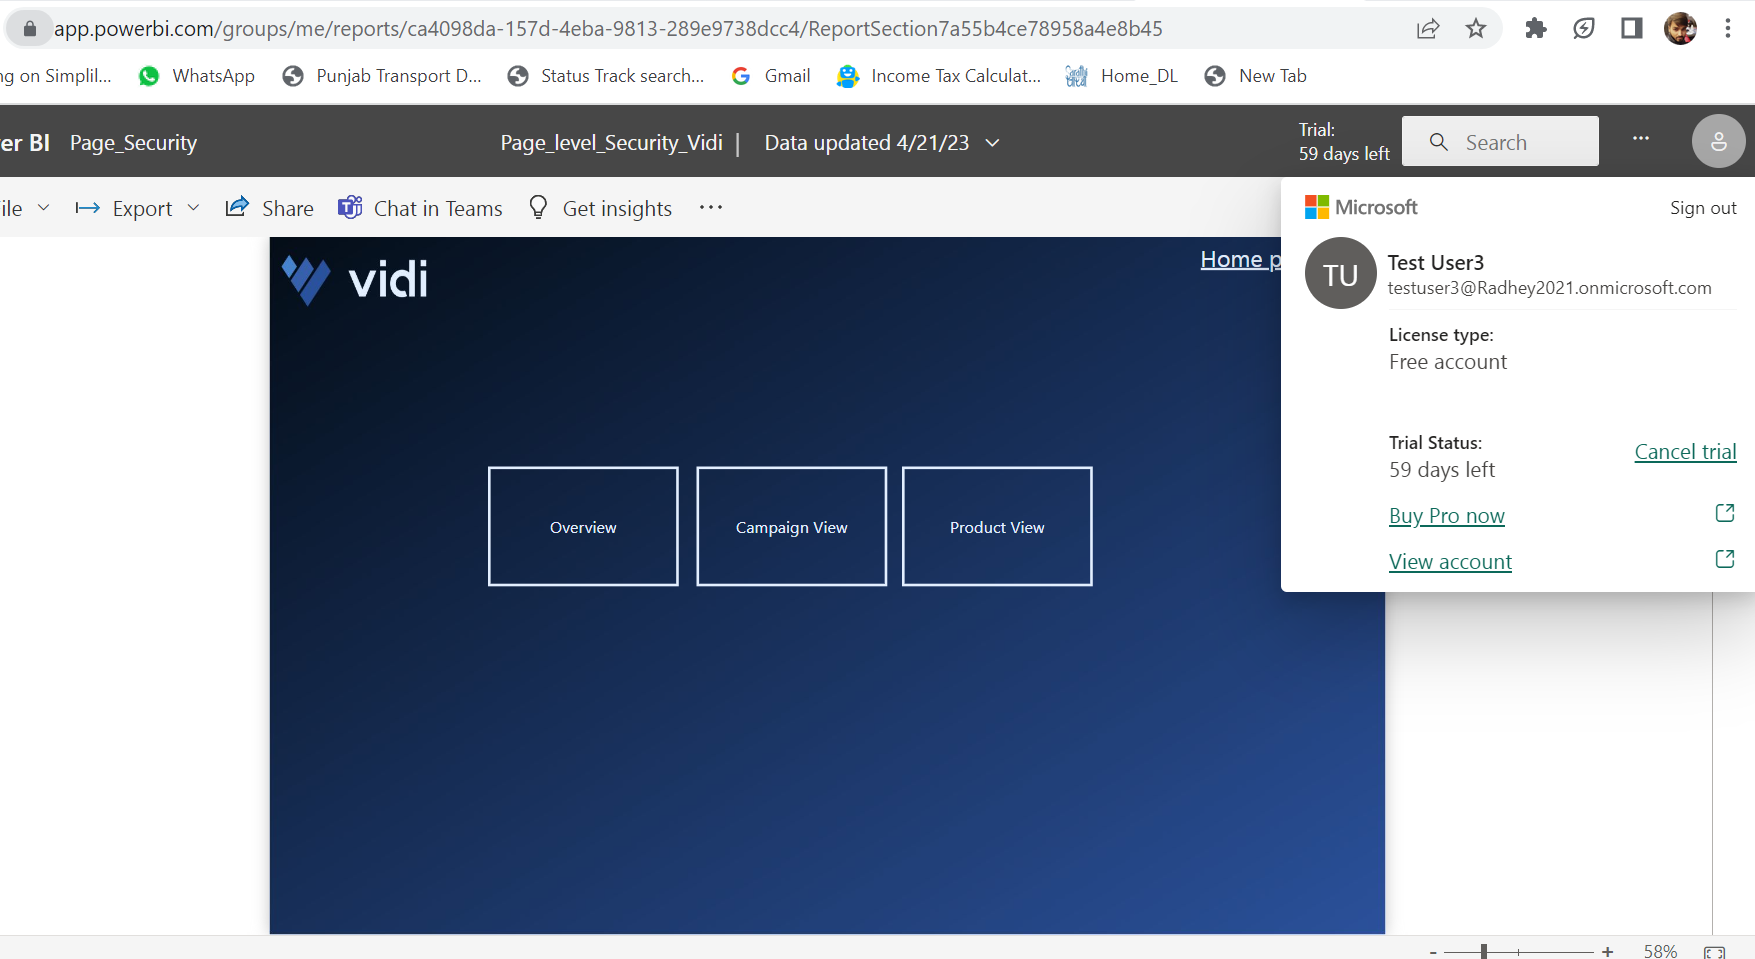
14. Click on the ‘Overview’ button to navigate to the overview page:
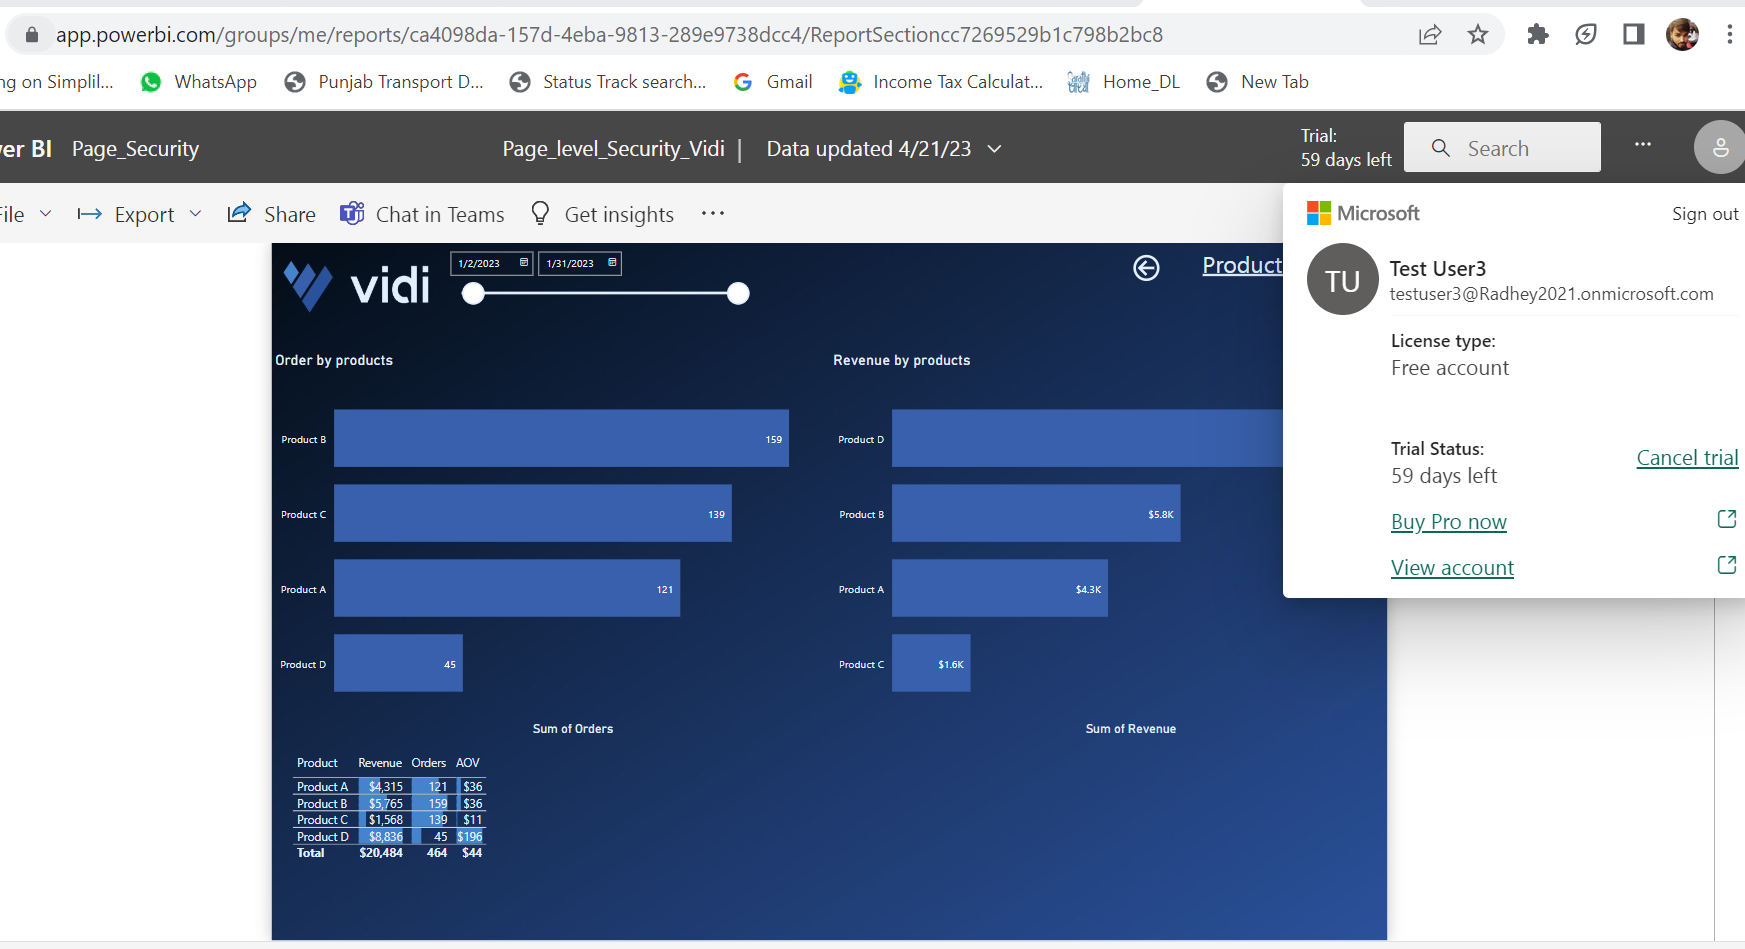
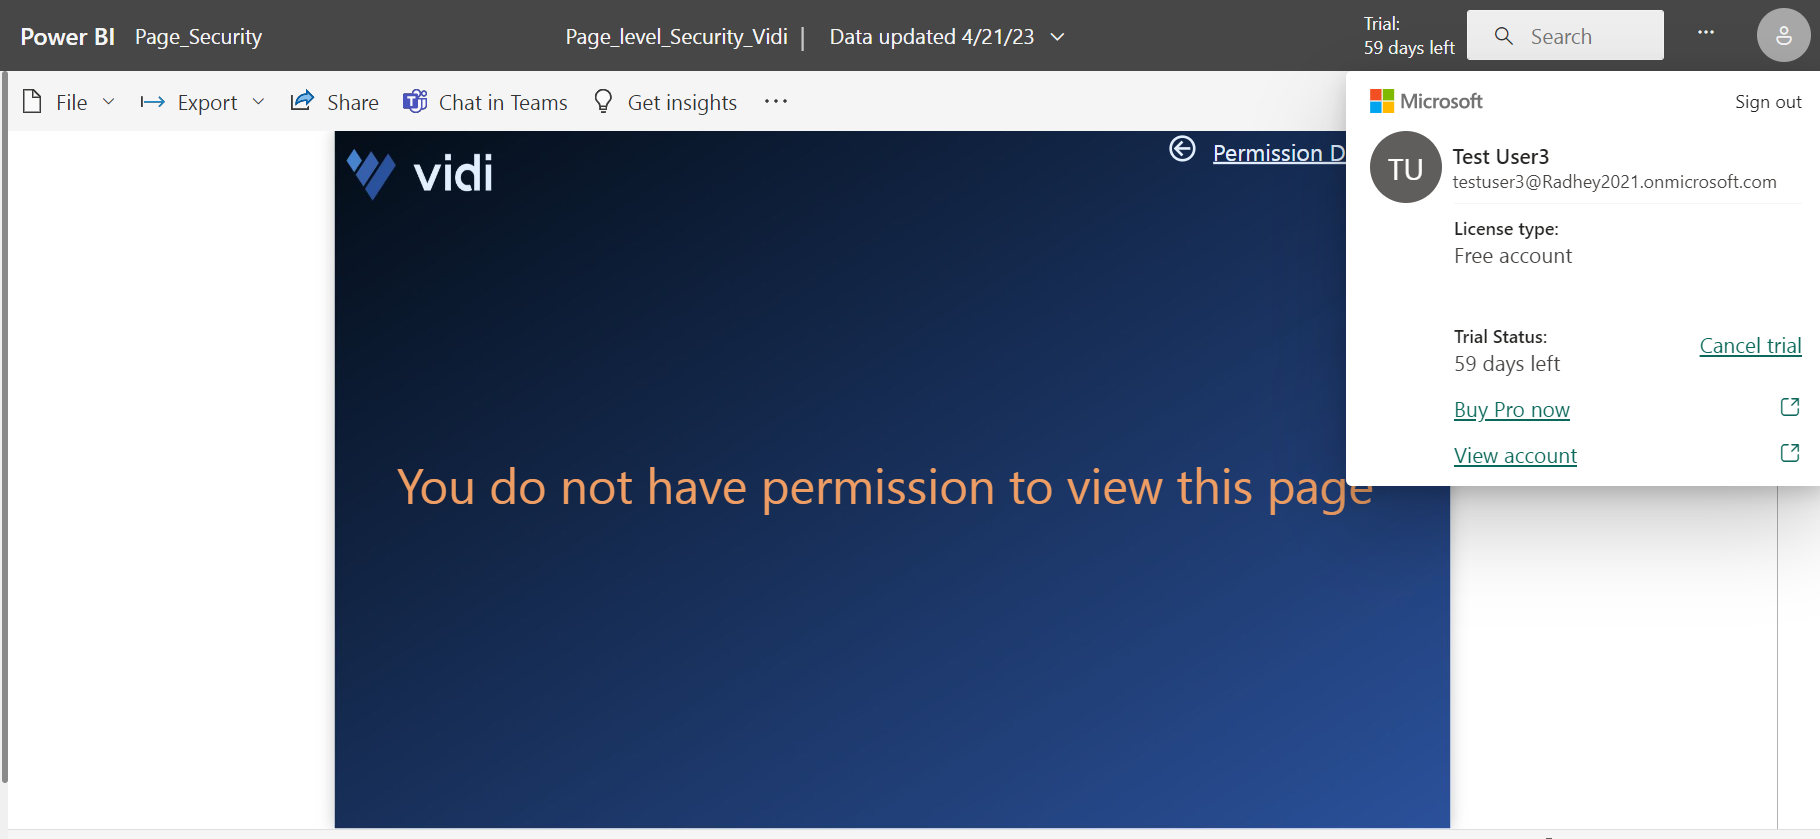
It is working as testuser3 is able to navigate to the overview page as per the permission table. Let’s go back to the home page and click on ‘campaign view.’
Since the user does not have access to the ‘campaign page’, Power BI will redirect the user to the Denied page created by us and display a message. For a similar view on the ProductView button click:
Likewise, we tested for other users and it was showing the page as per permission assigned in the permission table using row-level security.
This article has highlighted the approach to implementing page-level security in Power BI using RLS and Dax. It is not an out-of-box feature so there are certain limitations that can be avoided by following tips:
![]()
![]()
![]()